
Daddy’s Old Shirt Into New Toddler Shorts
[adsenseyu1]
Ok so before I begin I have a few disclaimers.
1. I am not a seamstress, I do this for fun and have taught myself, probably the wrong way lol.
2. This is a quick and easy way to make shorts, if you want something fancier, there are patterns out there for that.
3. The pictures suck big time, it was raining and I was unaware Dean had smeared his fingers all over the lens until after I took the pictures.
4. Yes the fabric I am working with is wrinkly, it was down the bottom of my sewing bag.
5. You should use a wider elastic for the waistband, I used what I had on hand and it works fine, but thicker would be better.
So now that we have gotten that out of the way here is my tutorial on how I make Dean shorts out of his dad’s old shirts. I like doing this because the shorts are very light being that t-shirt material is very light and cool and it’s free, one quick run through daddy’s closet and you got yourself a whole summers worth of shorts for free, take that Baby Gap! Oh and you are recycling and reusing which is pretty awesome! :)
Sooooo here we go. I have never done a tutorial like this so let see what happens.
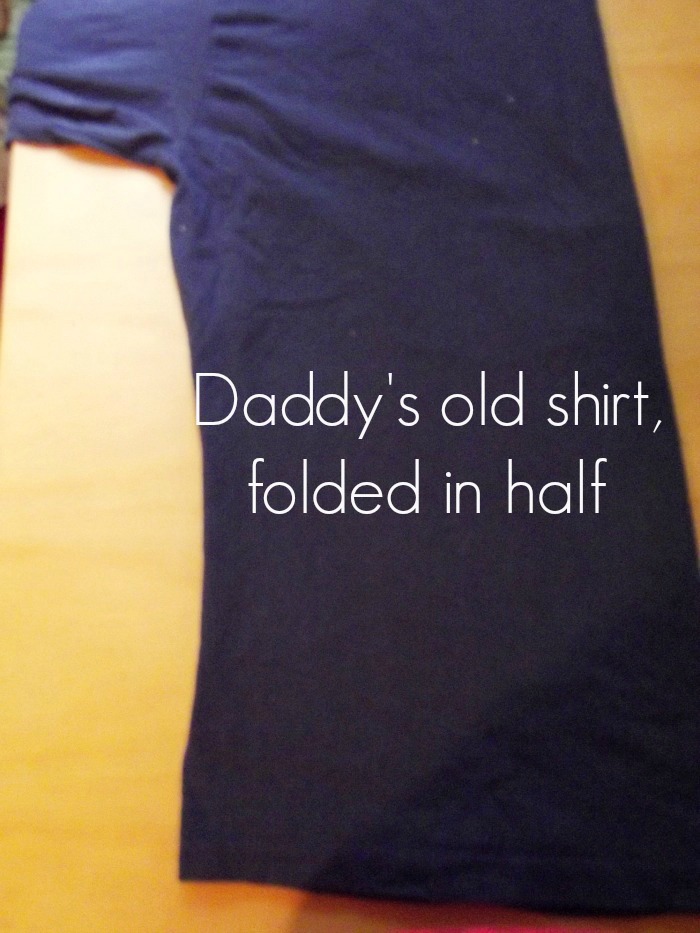
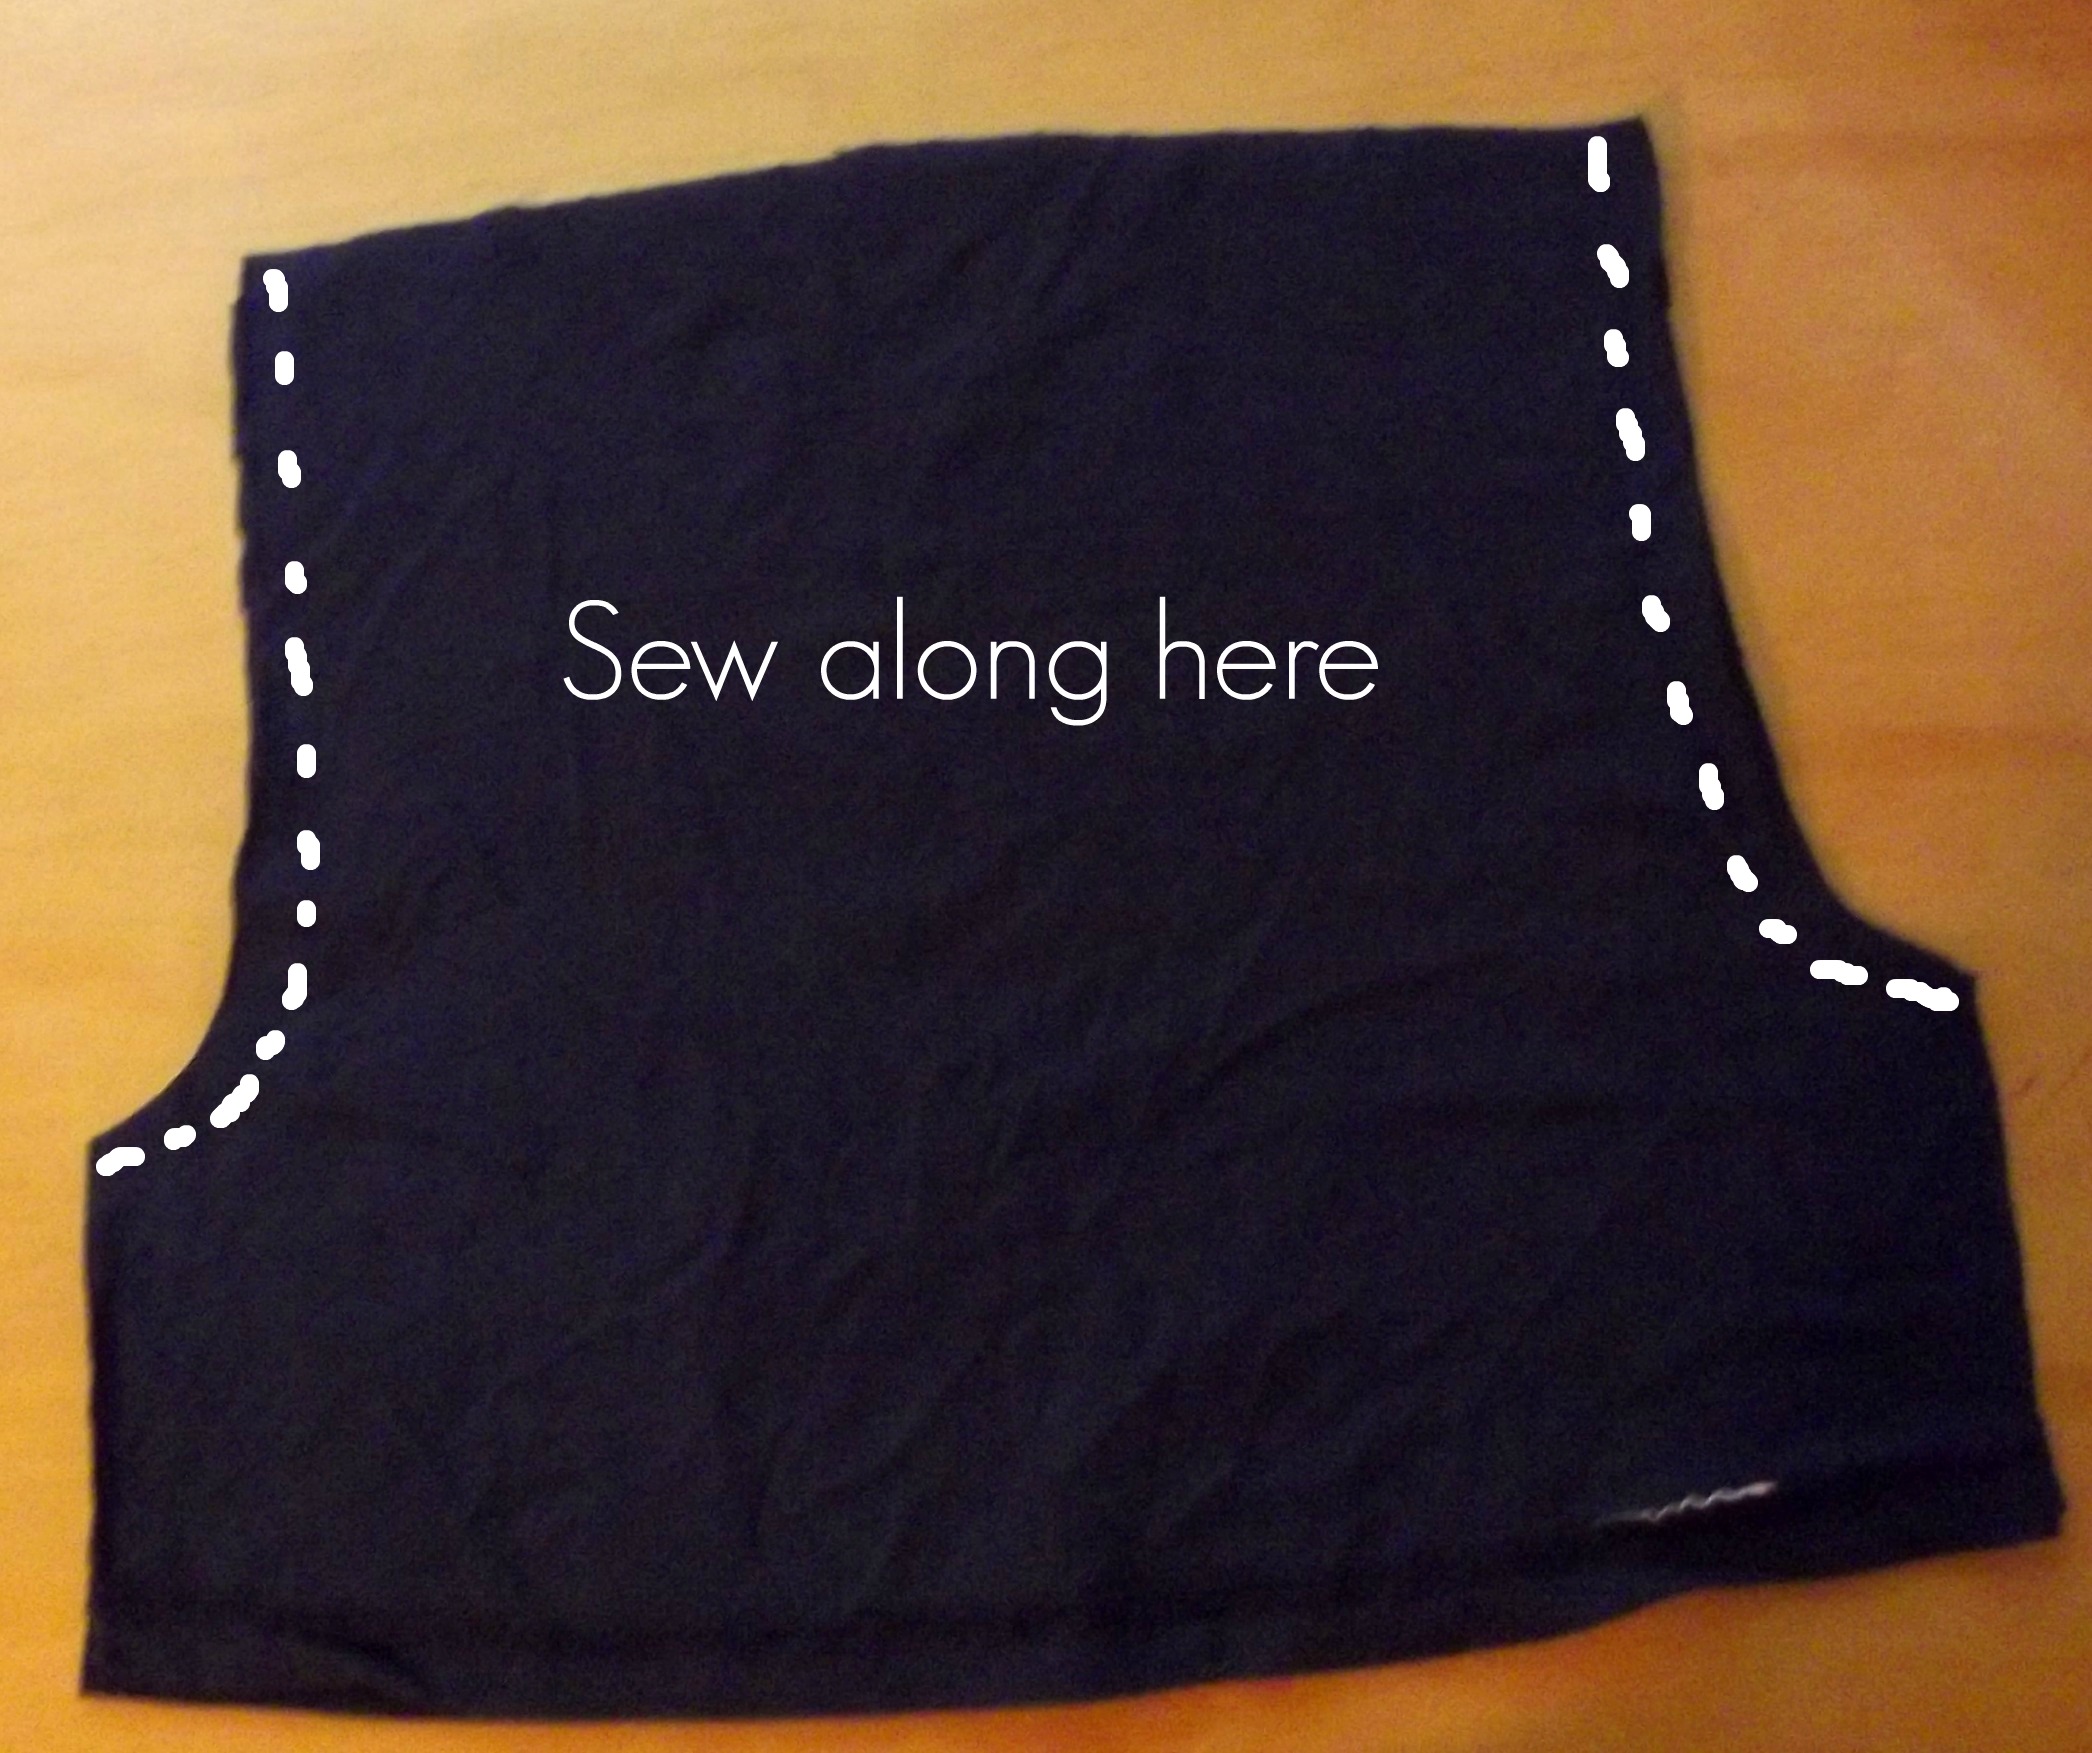
First find a shirt and fold it in half making sure to match up all seams and hems.
Next get a pair of shorts that already fit your toddler well, fold them in half and place them on the shirt, matching the bottom hem of the shorts to the bottom hem of the shirt. Cut along the outline of the shorts leaving space for seam allowance and enough space at the top for the wideness of your elastic for the waistband and waistband seam.
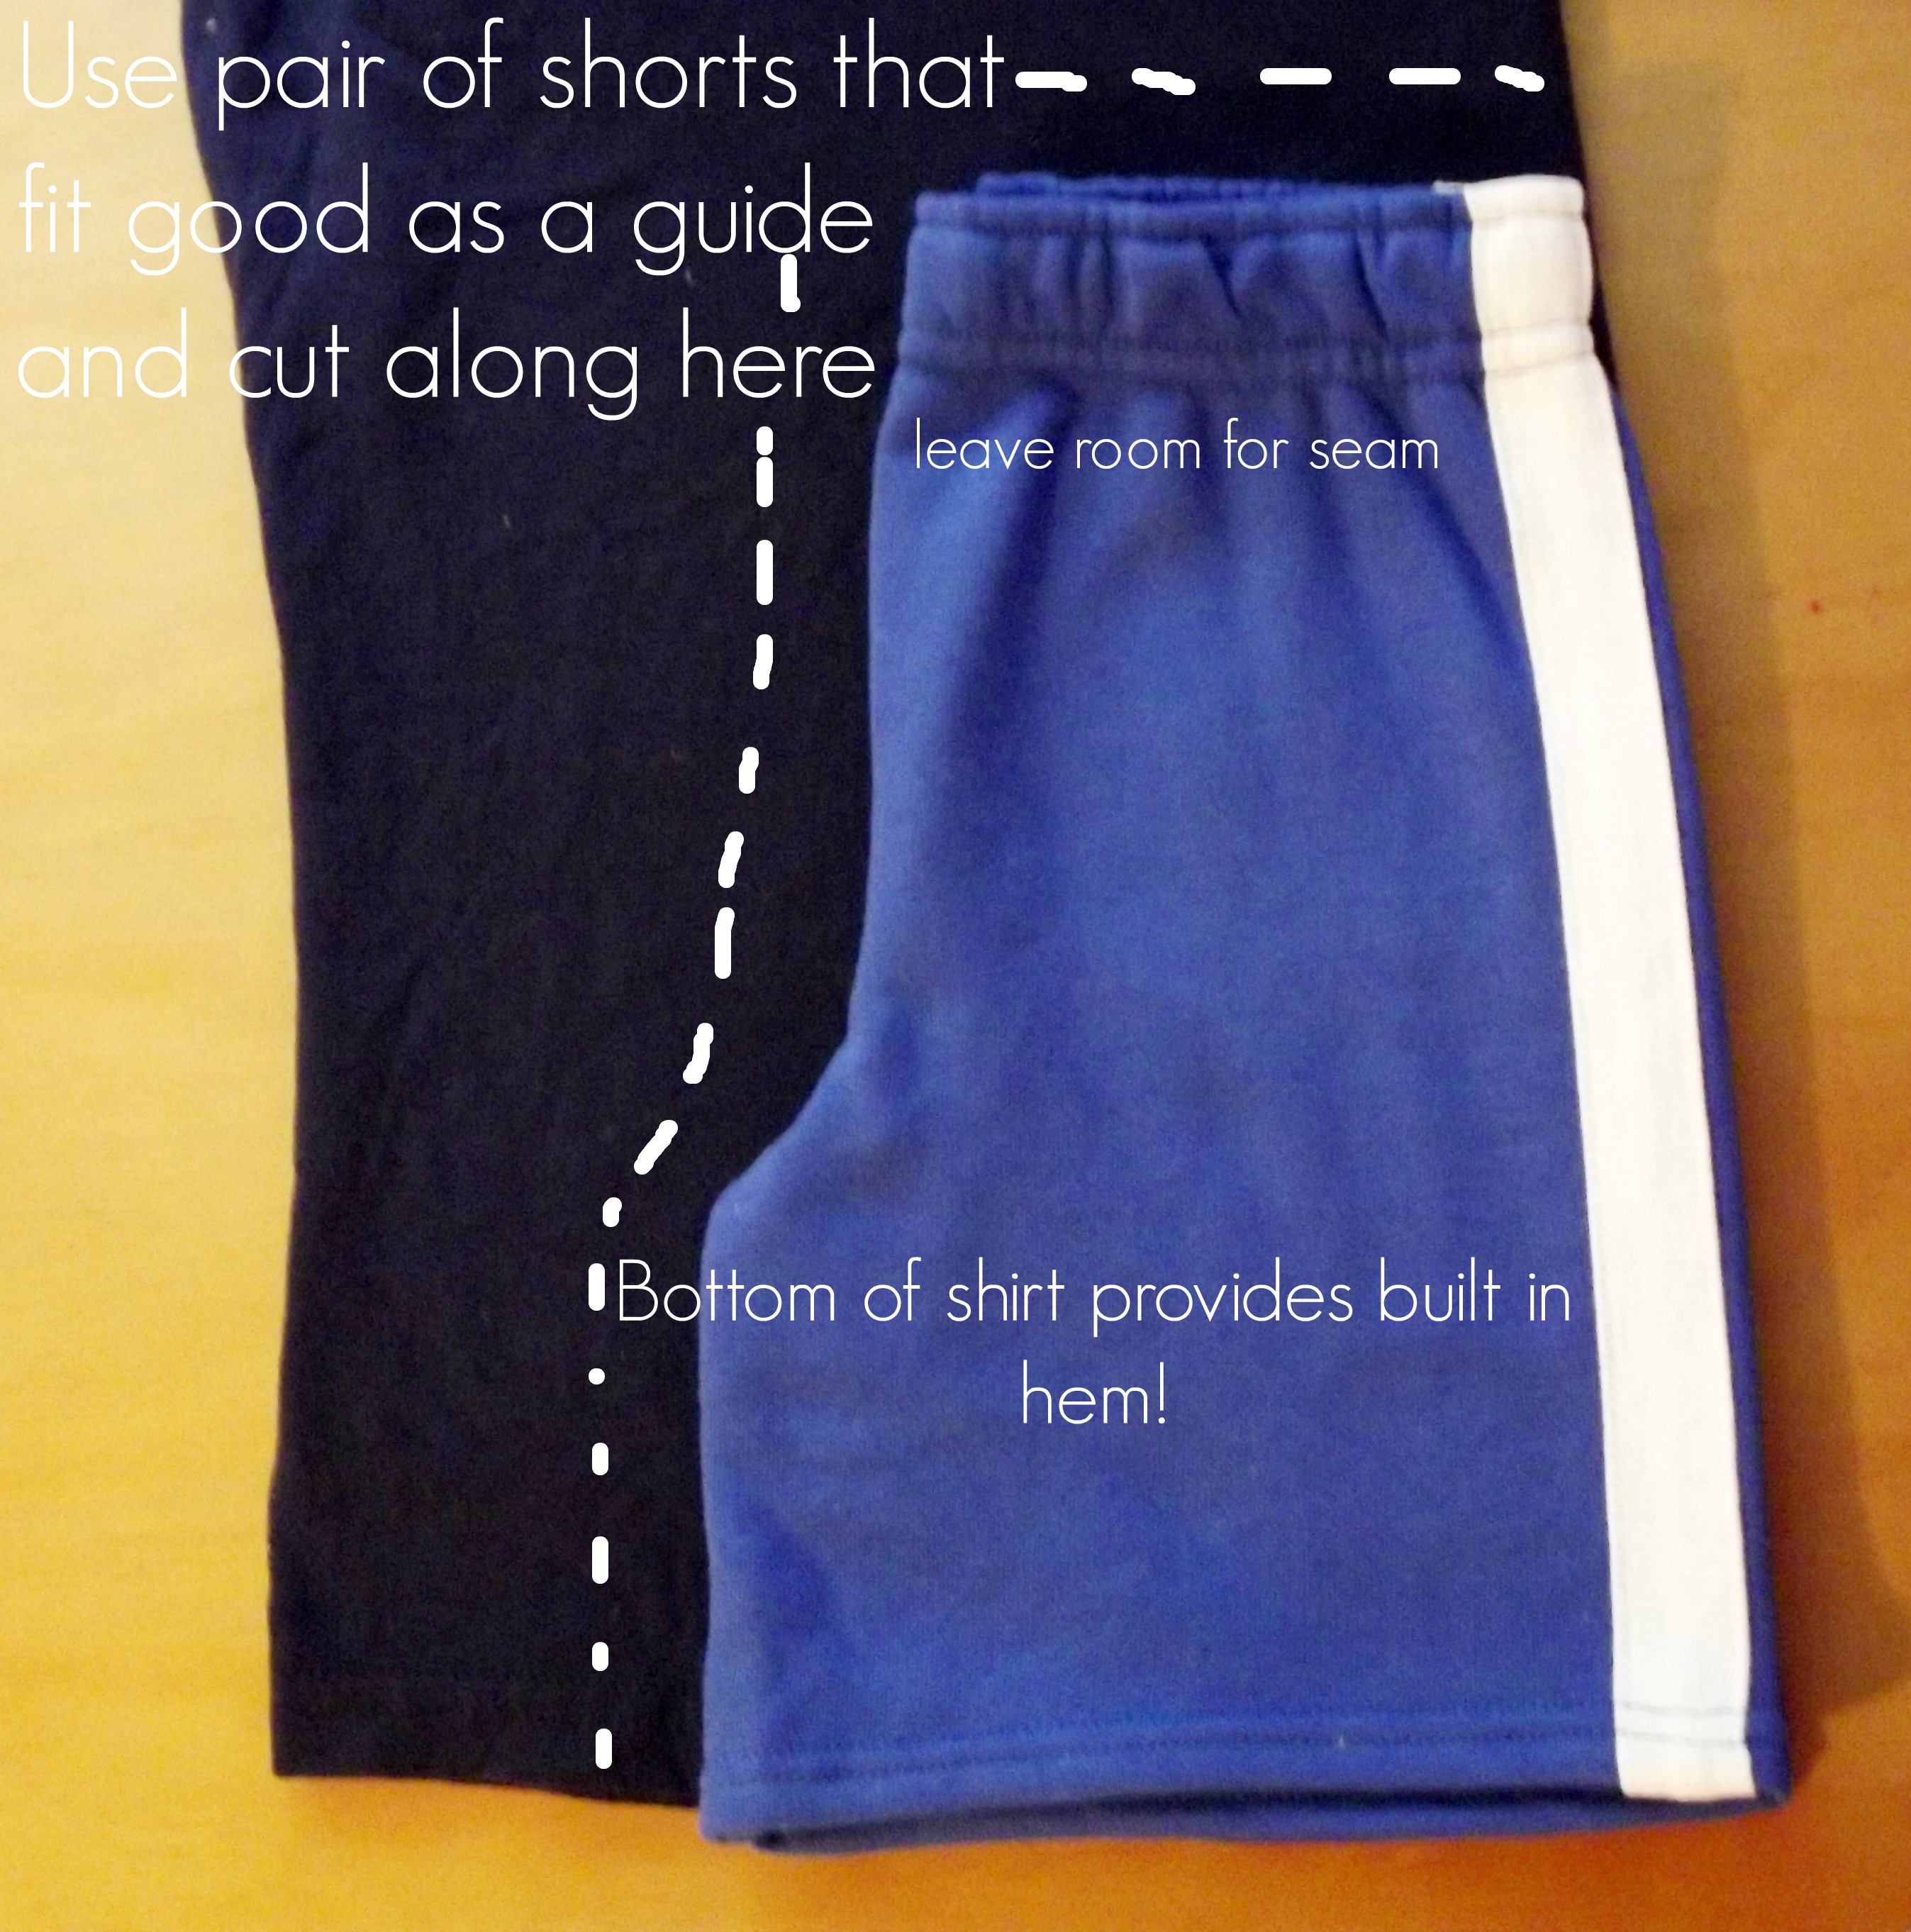
You will have a longer top than me if you are using wider elastic.
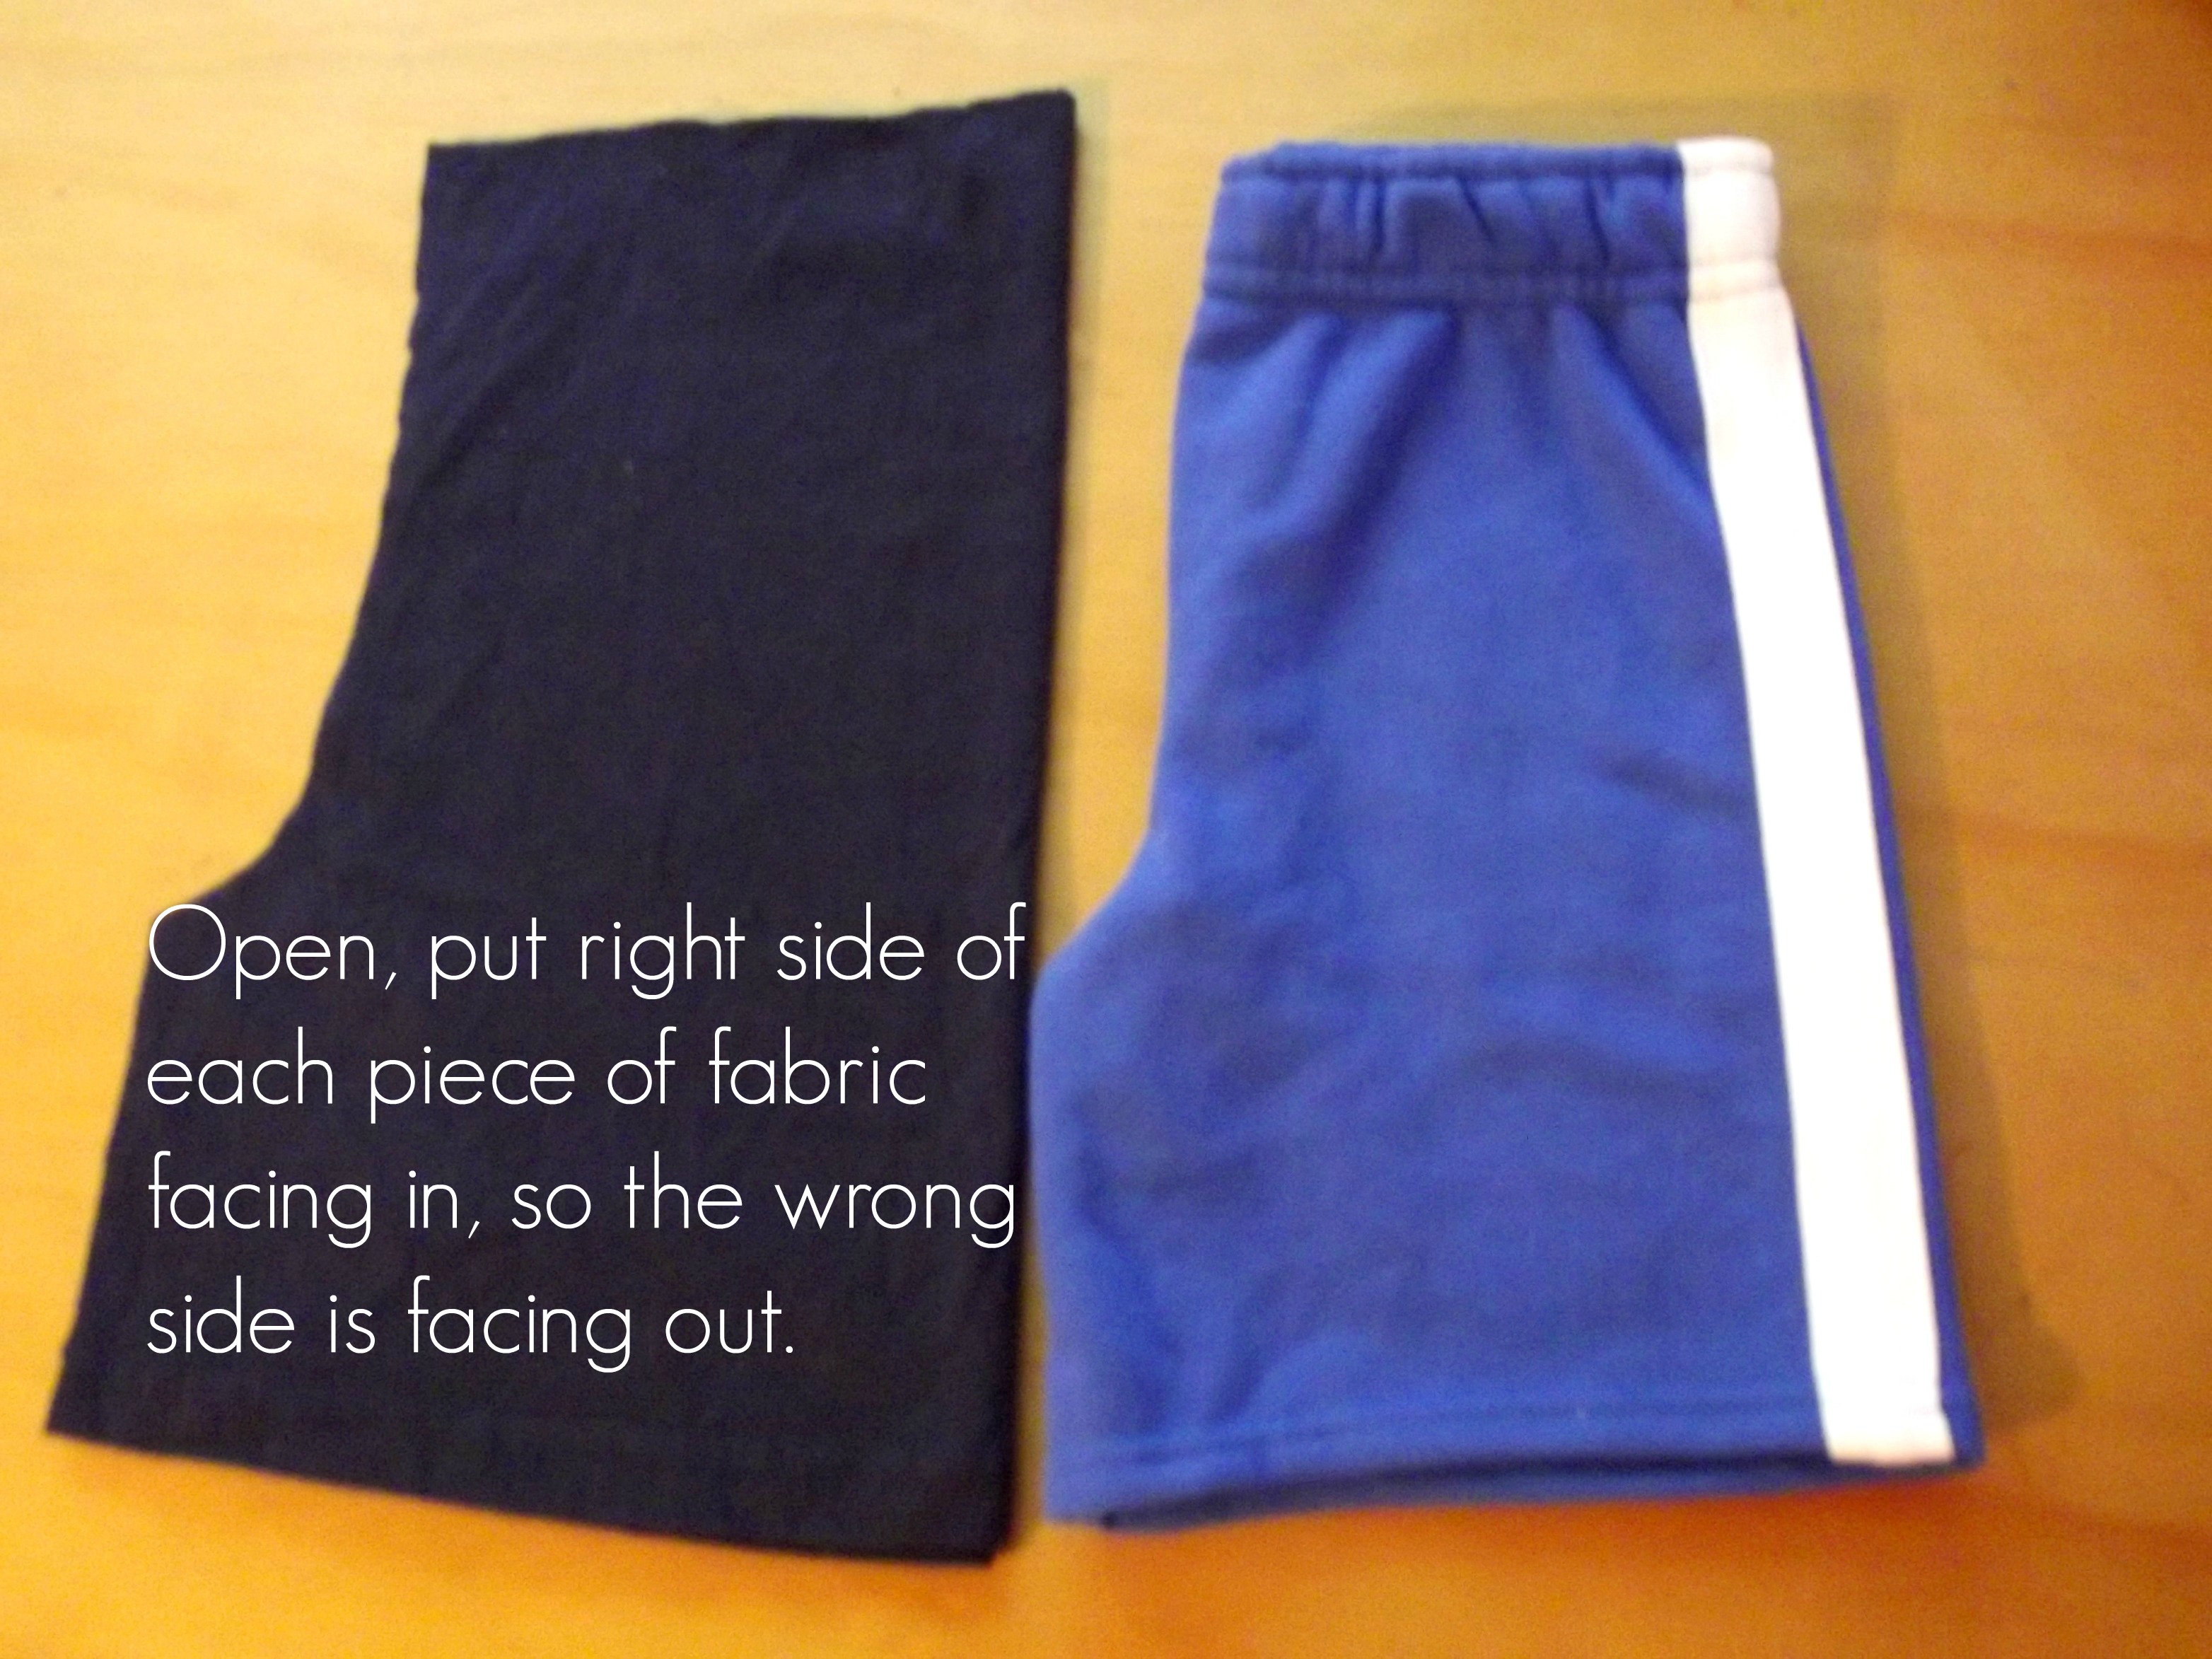
Now you have your two pieces of fabric, which you will want to unfold and line up with each other right sides facing in. Sew along the sides, only the areas I marked.
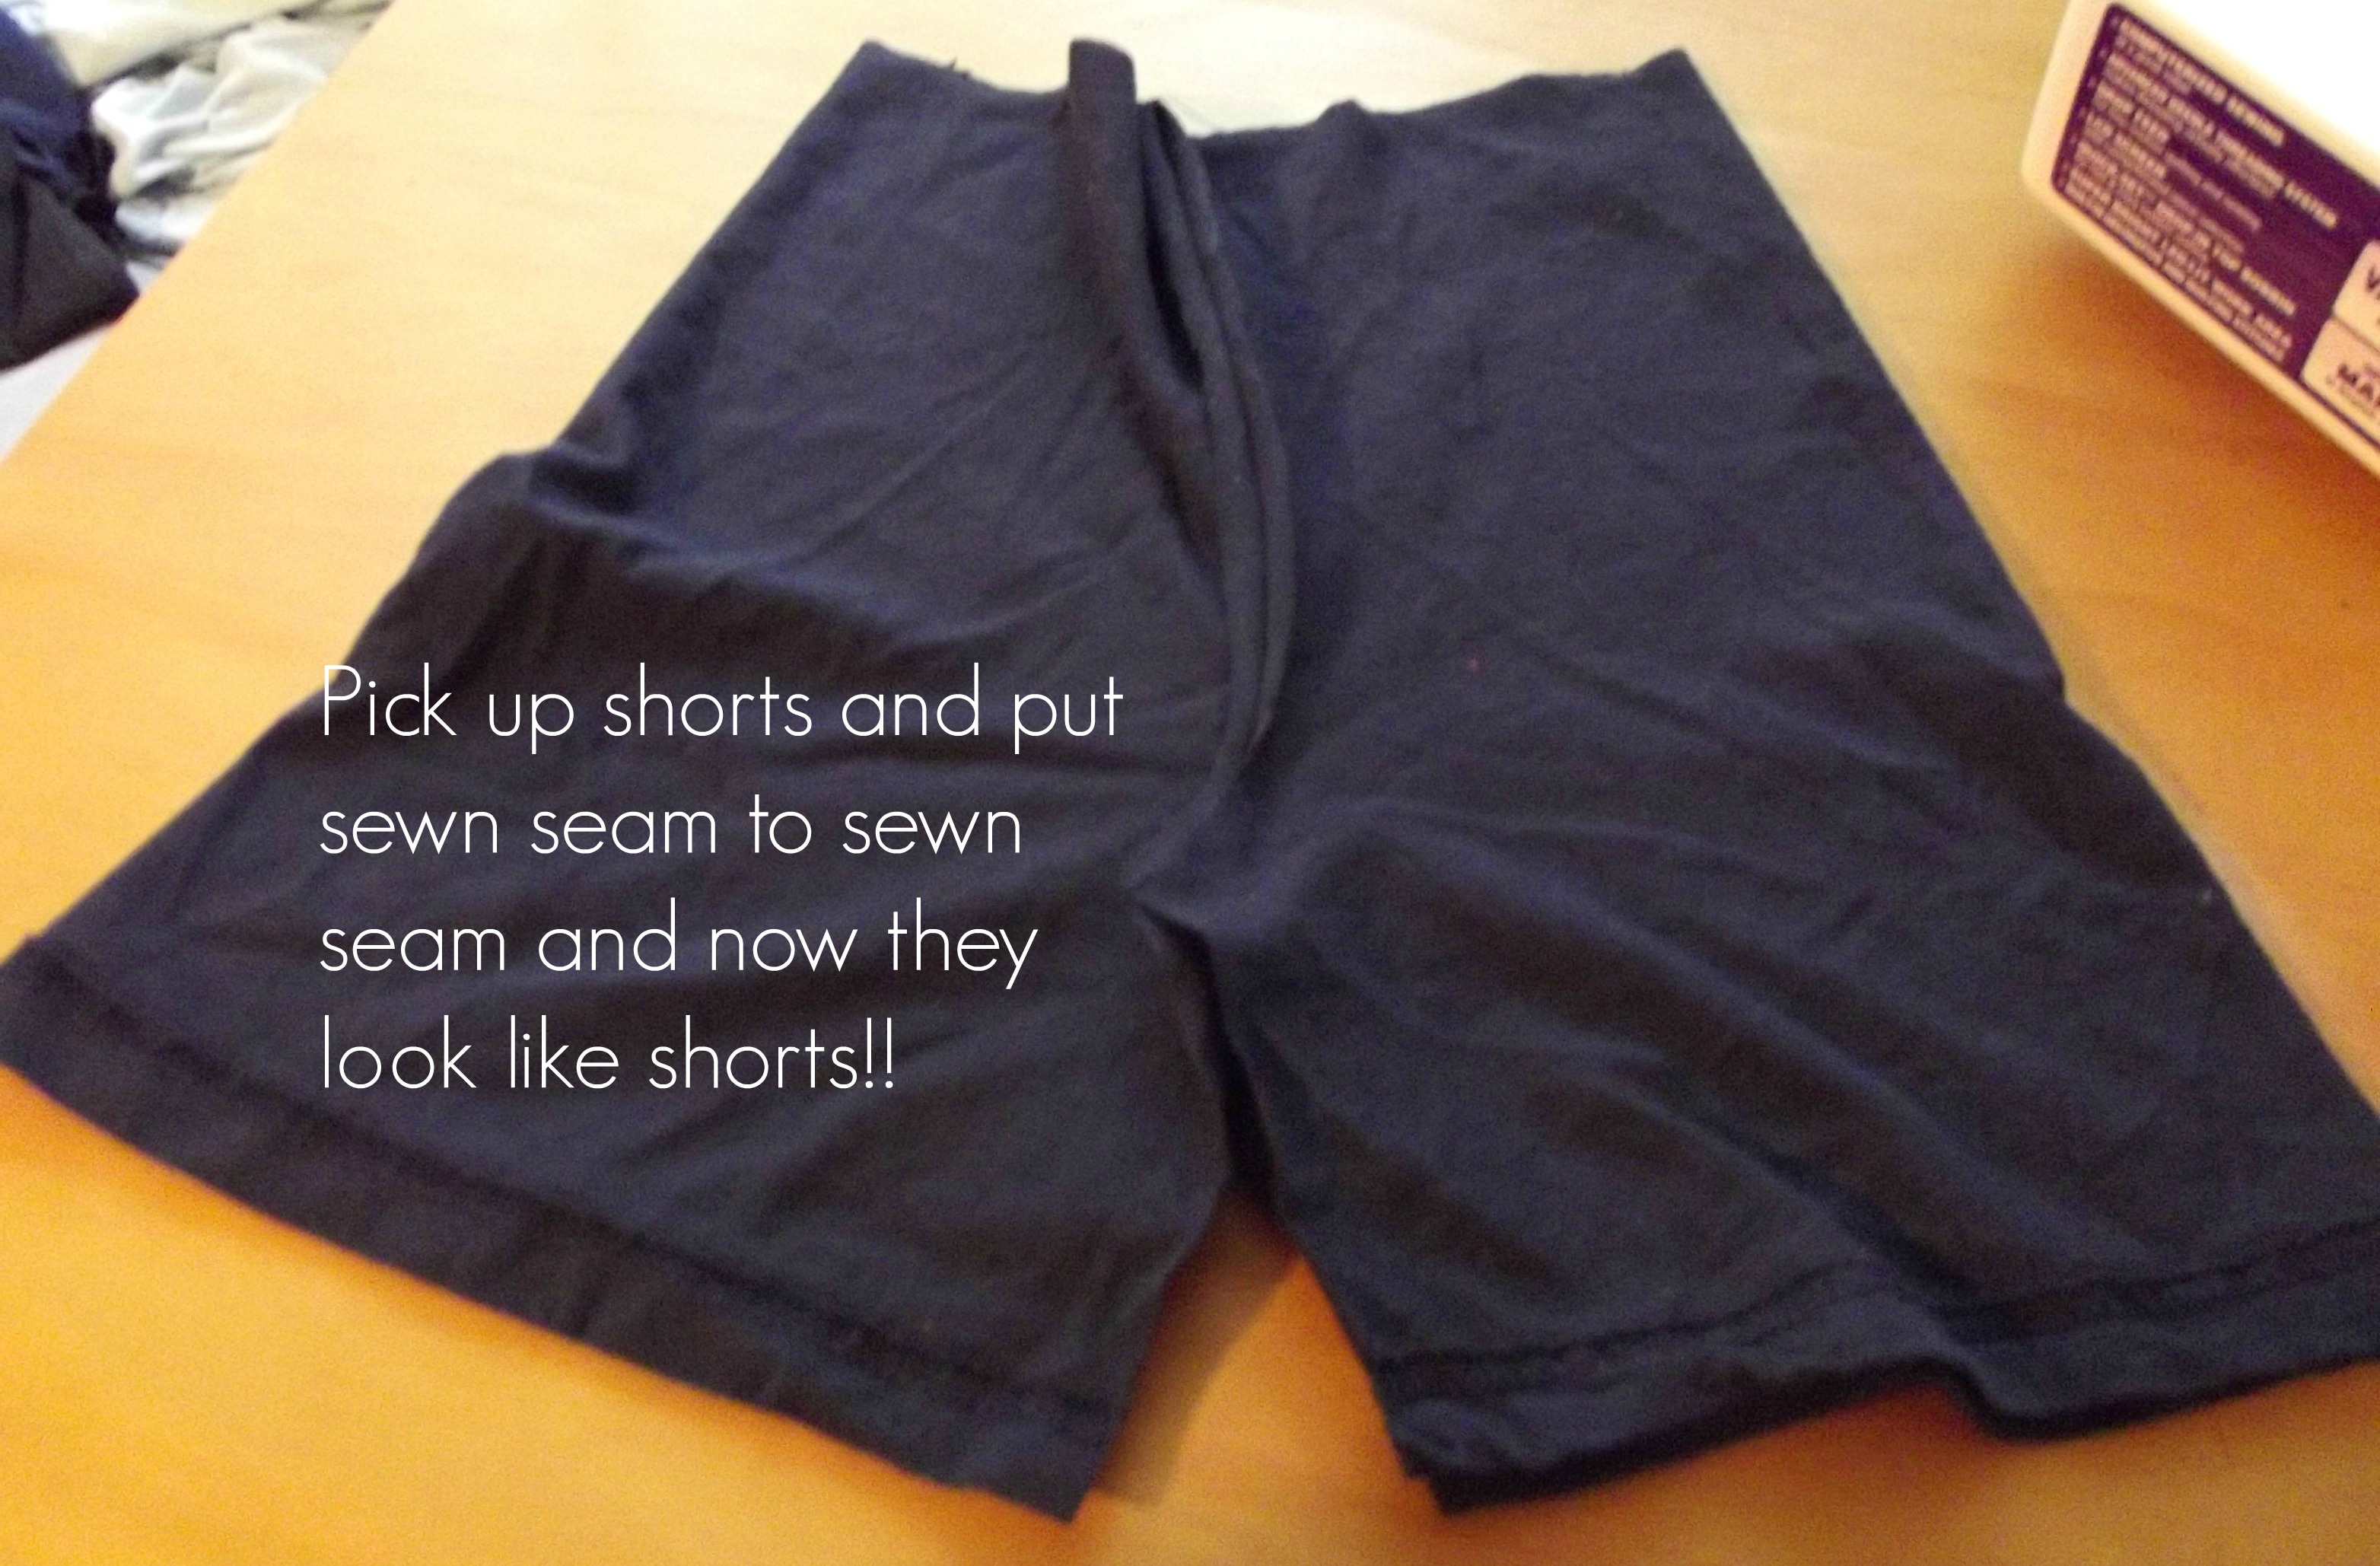
This part is hard to explain but you want to pick up the shorts and match the 2 seams you just sewed to each other, these will form your shorts.
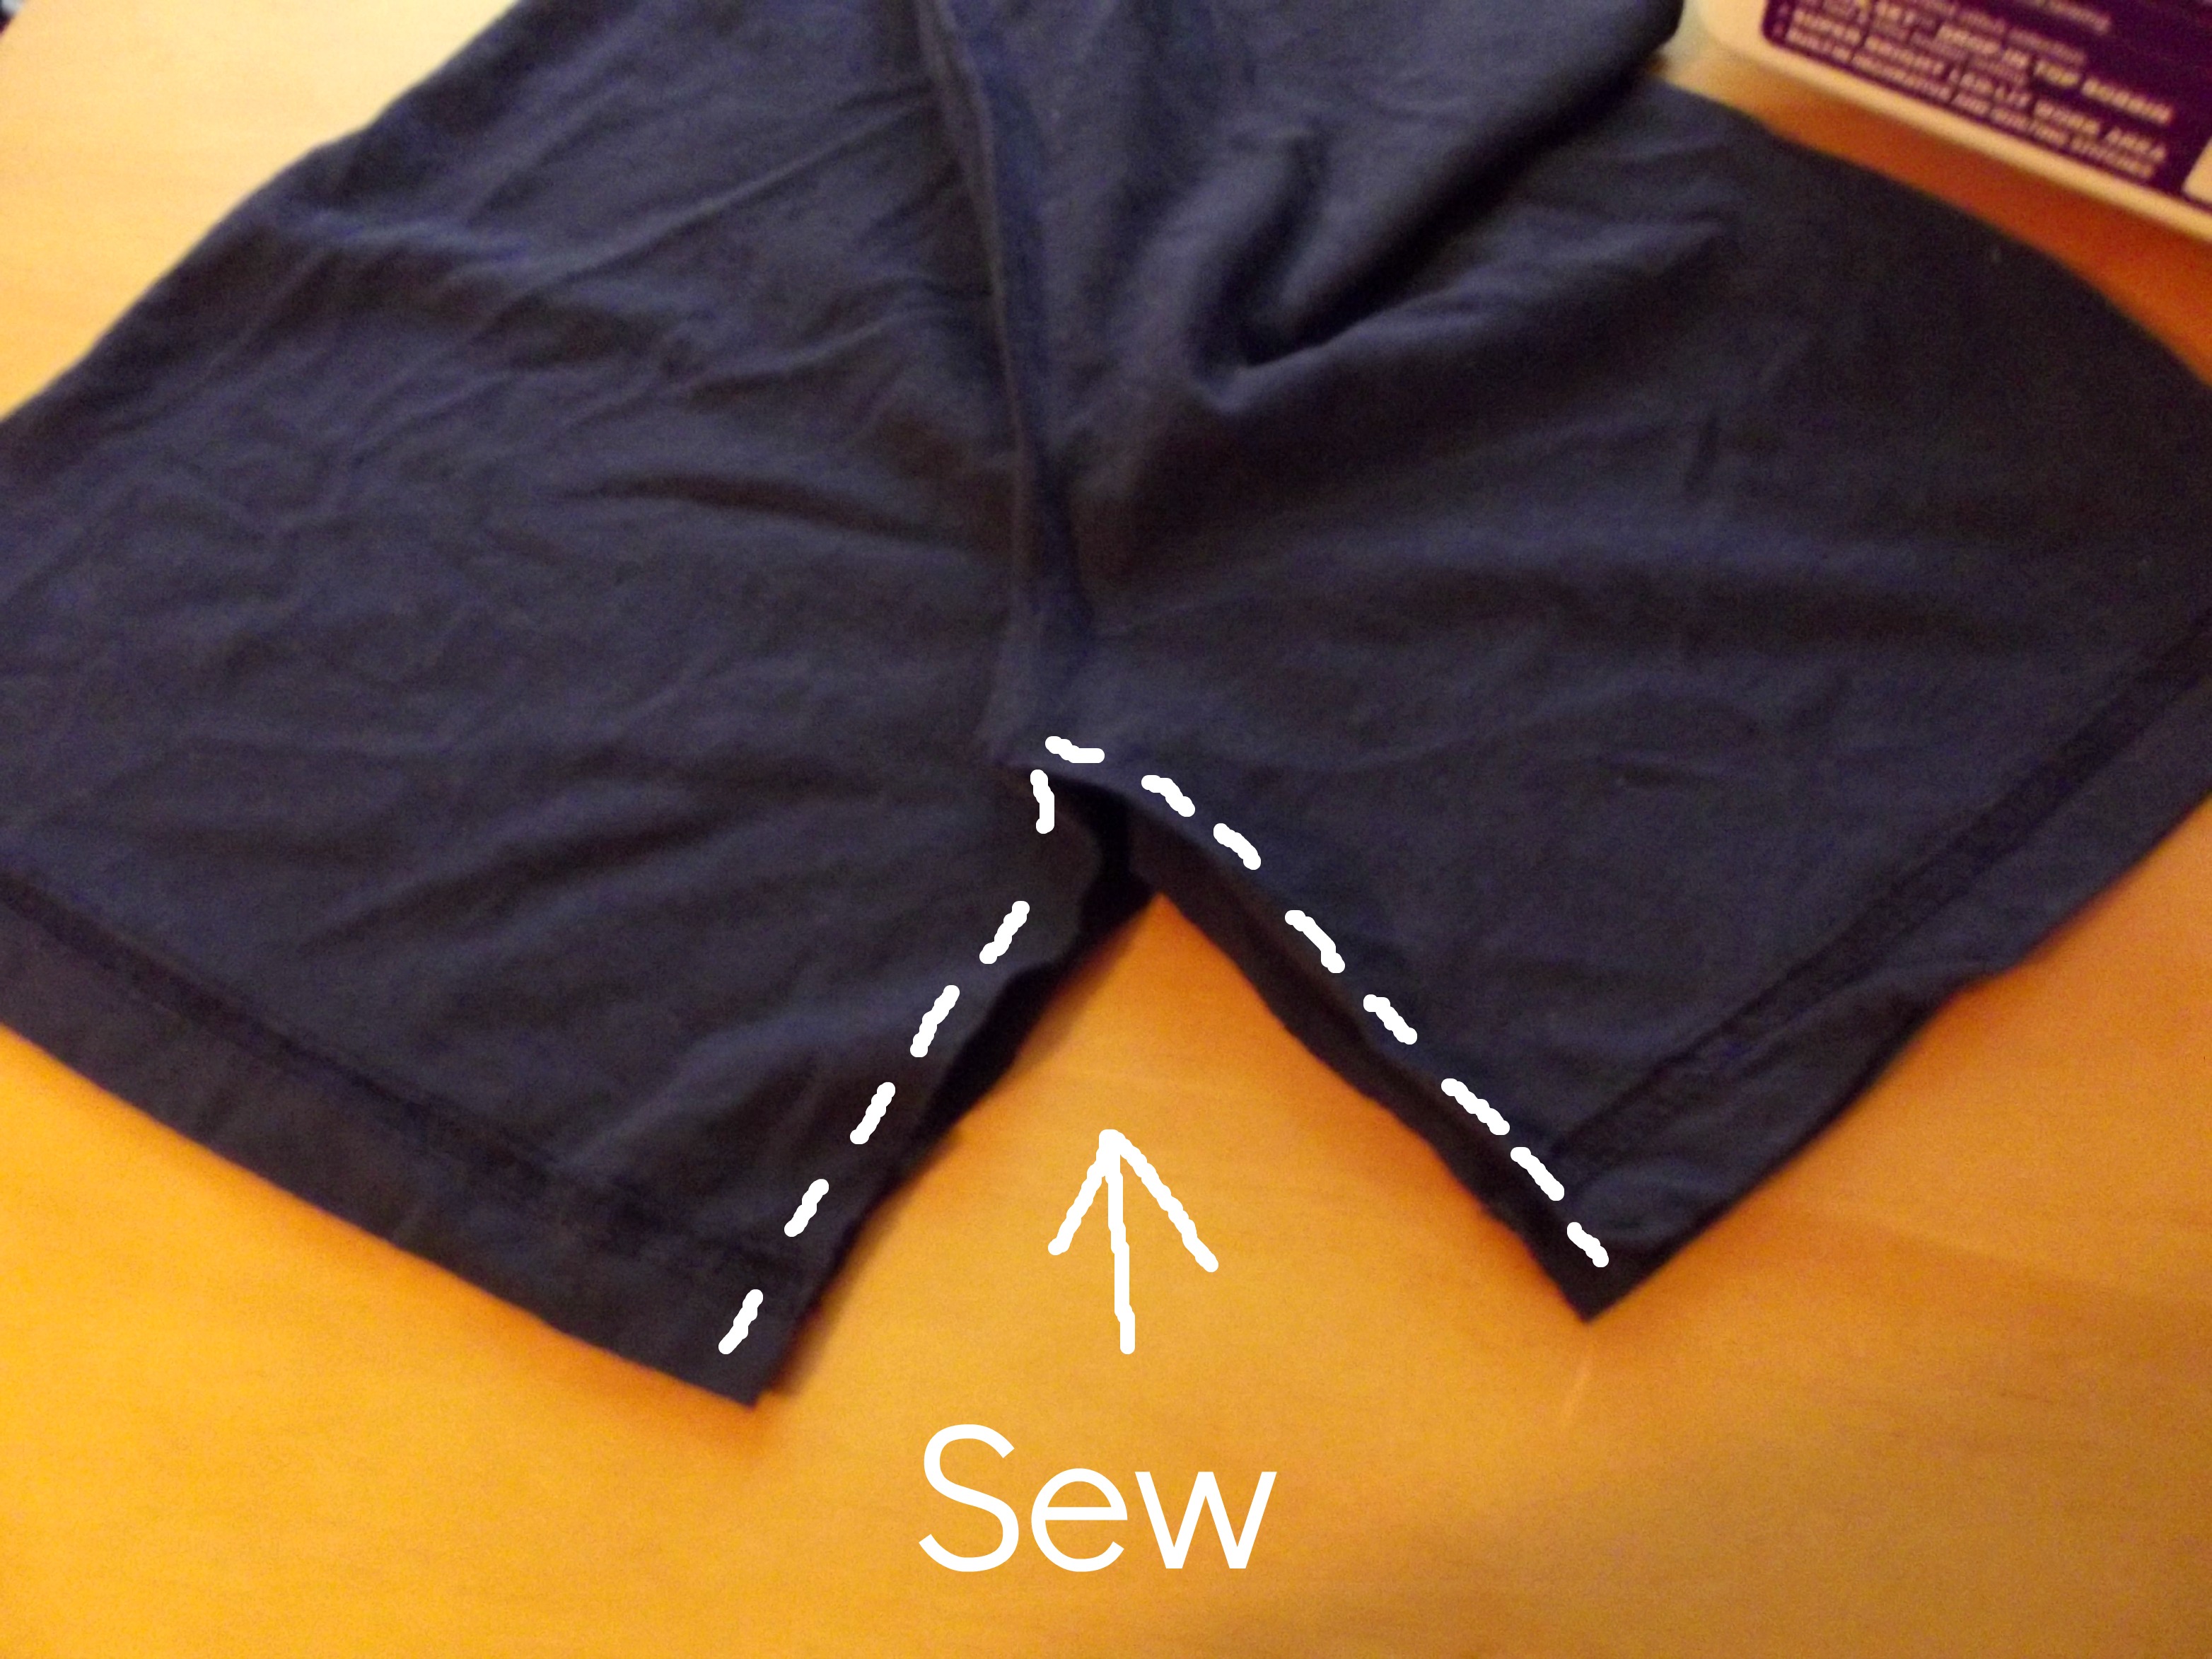
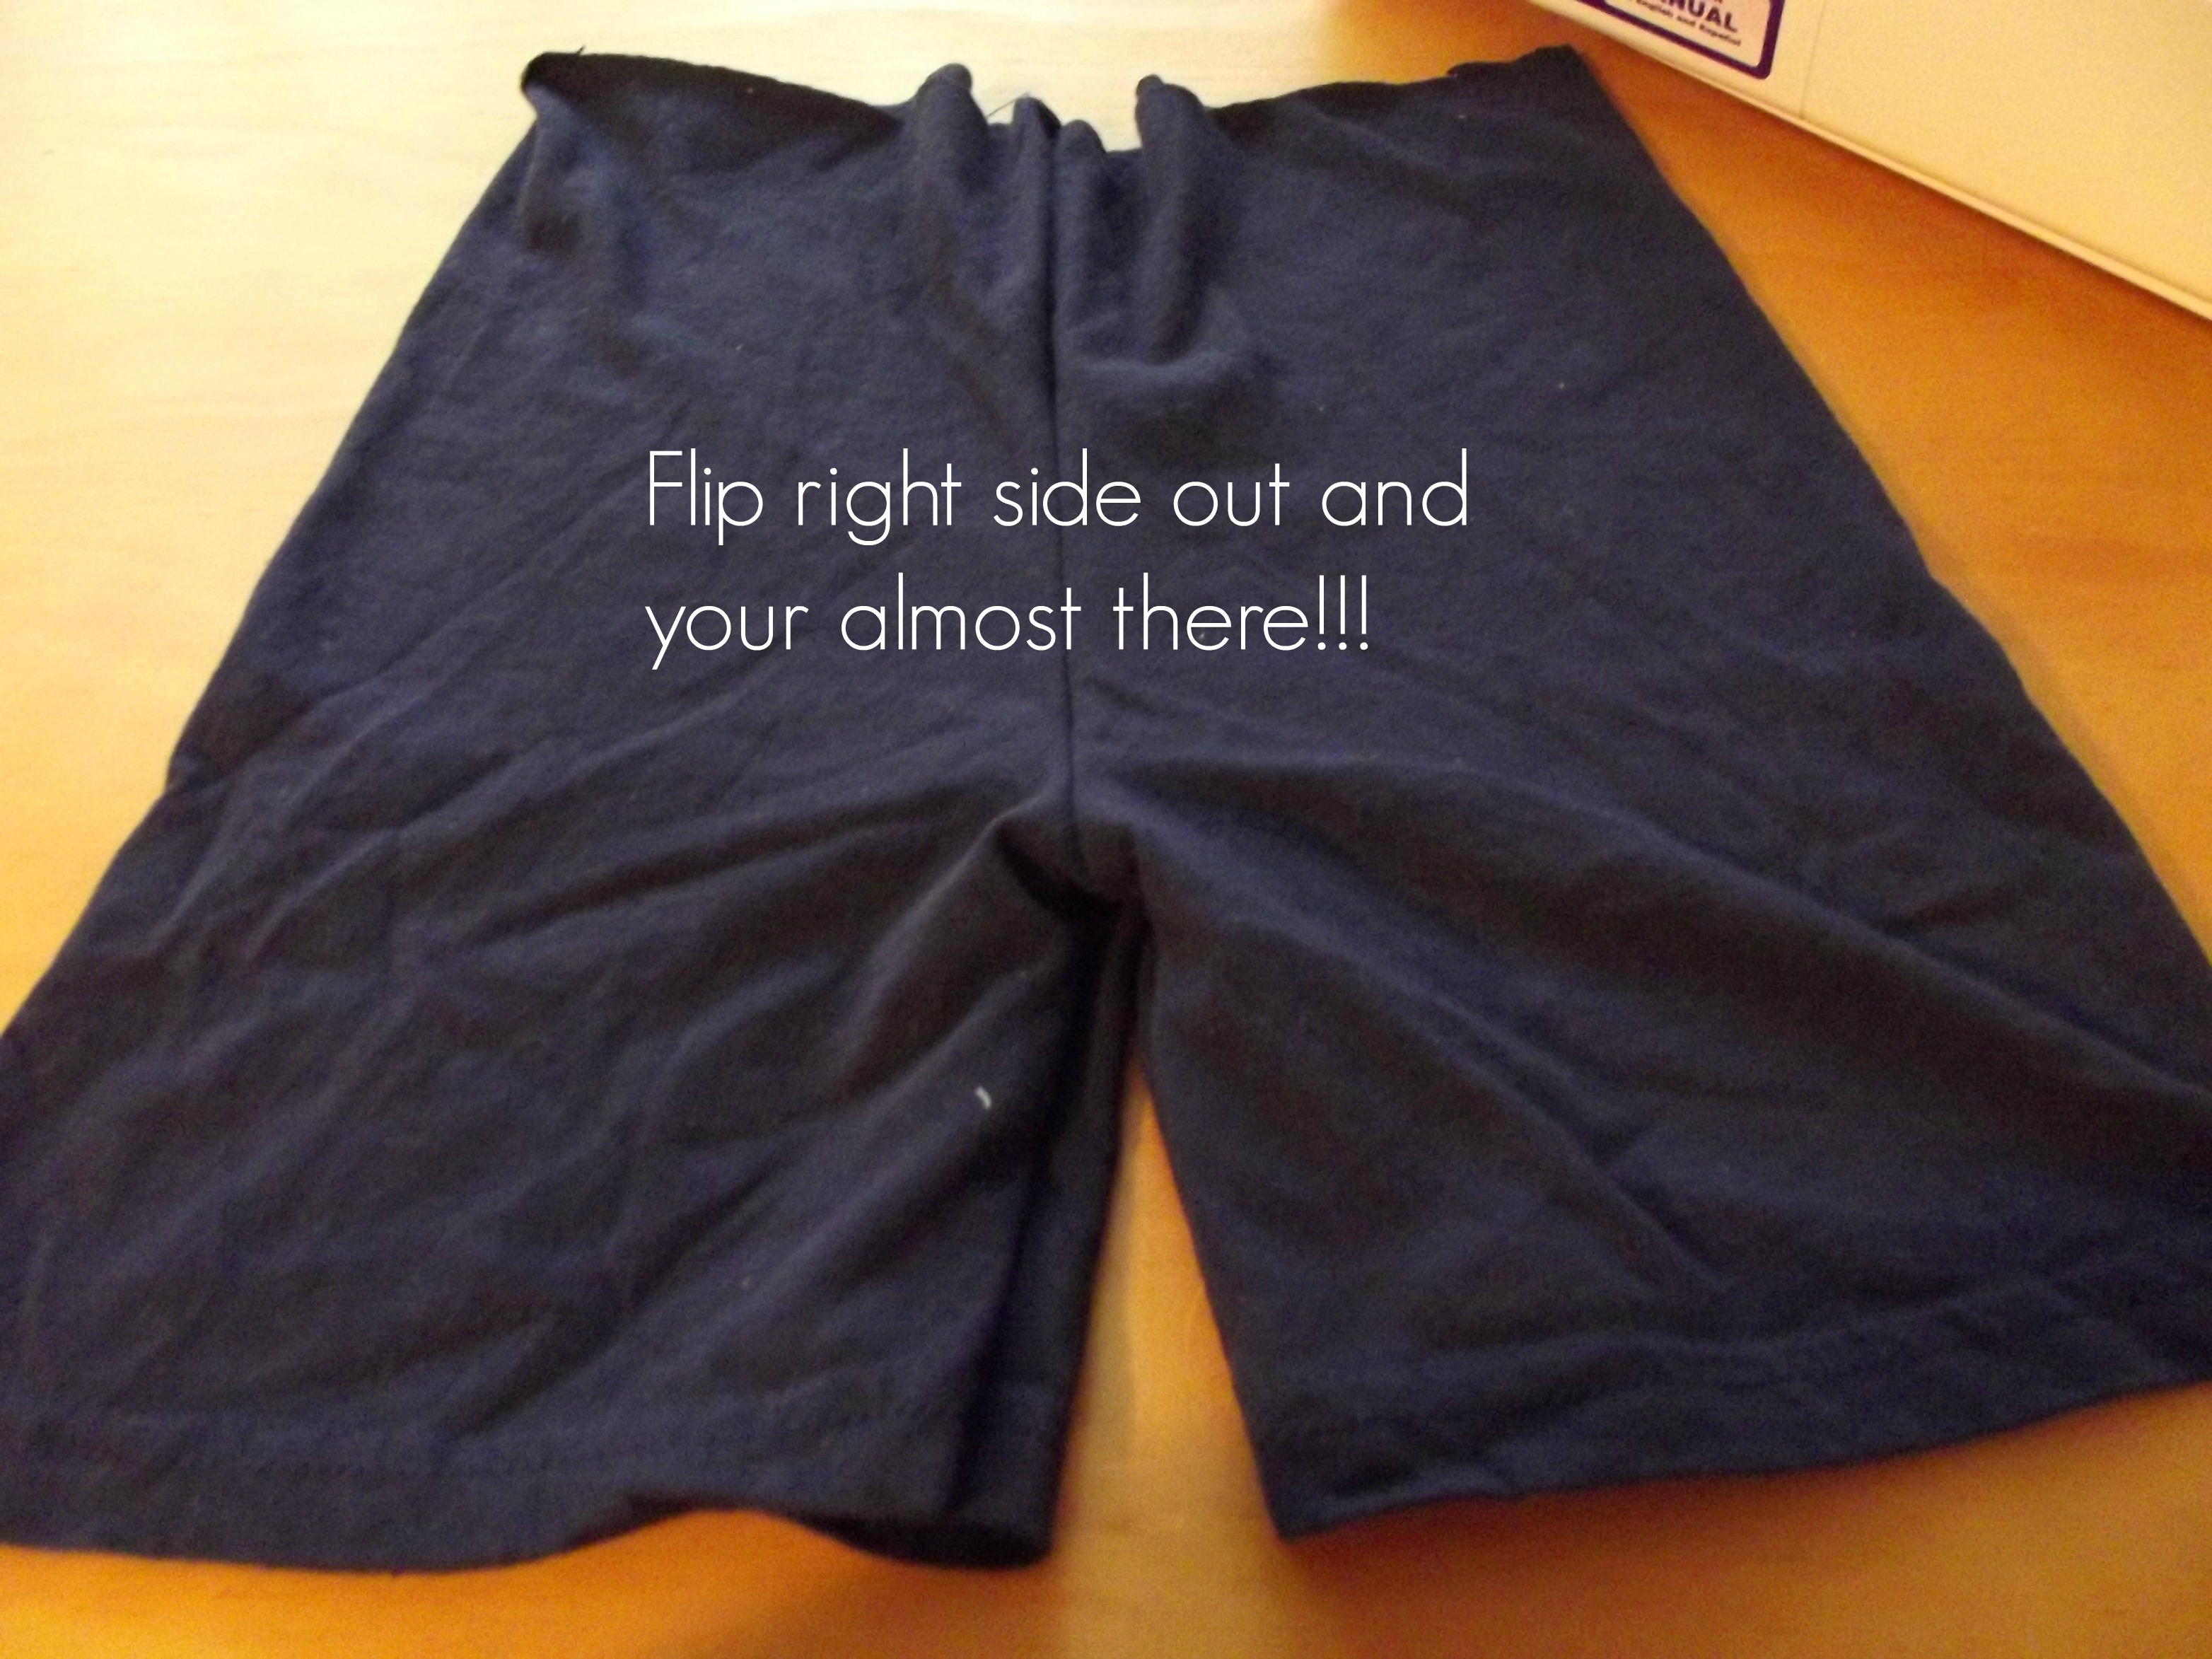
Sew the crotch area with one seam all the way across. Turn right side out to double check everything and look your almost done!!
Now get the shorts that already fit and use the waistband as a guide for how long to cut your elastic. Just lay the elastic from one end of the waistband to the other and then double it and cut it.

Flip shorts wrong side out, fold over the waistband making sure you have given enough room for the elastic and seam. Then pin the waistband.
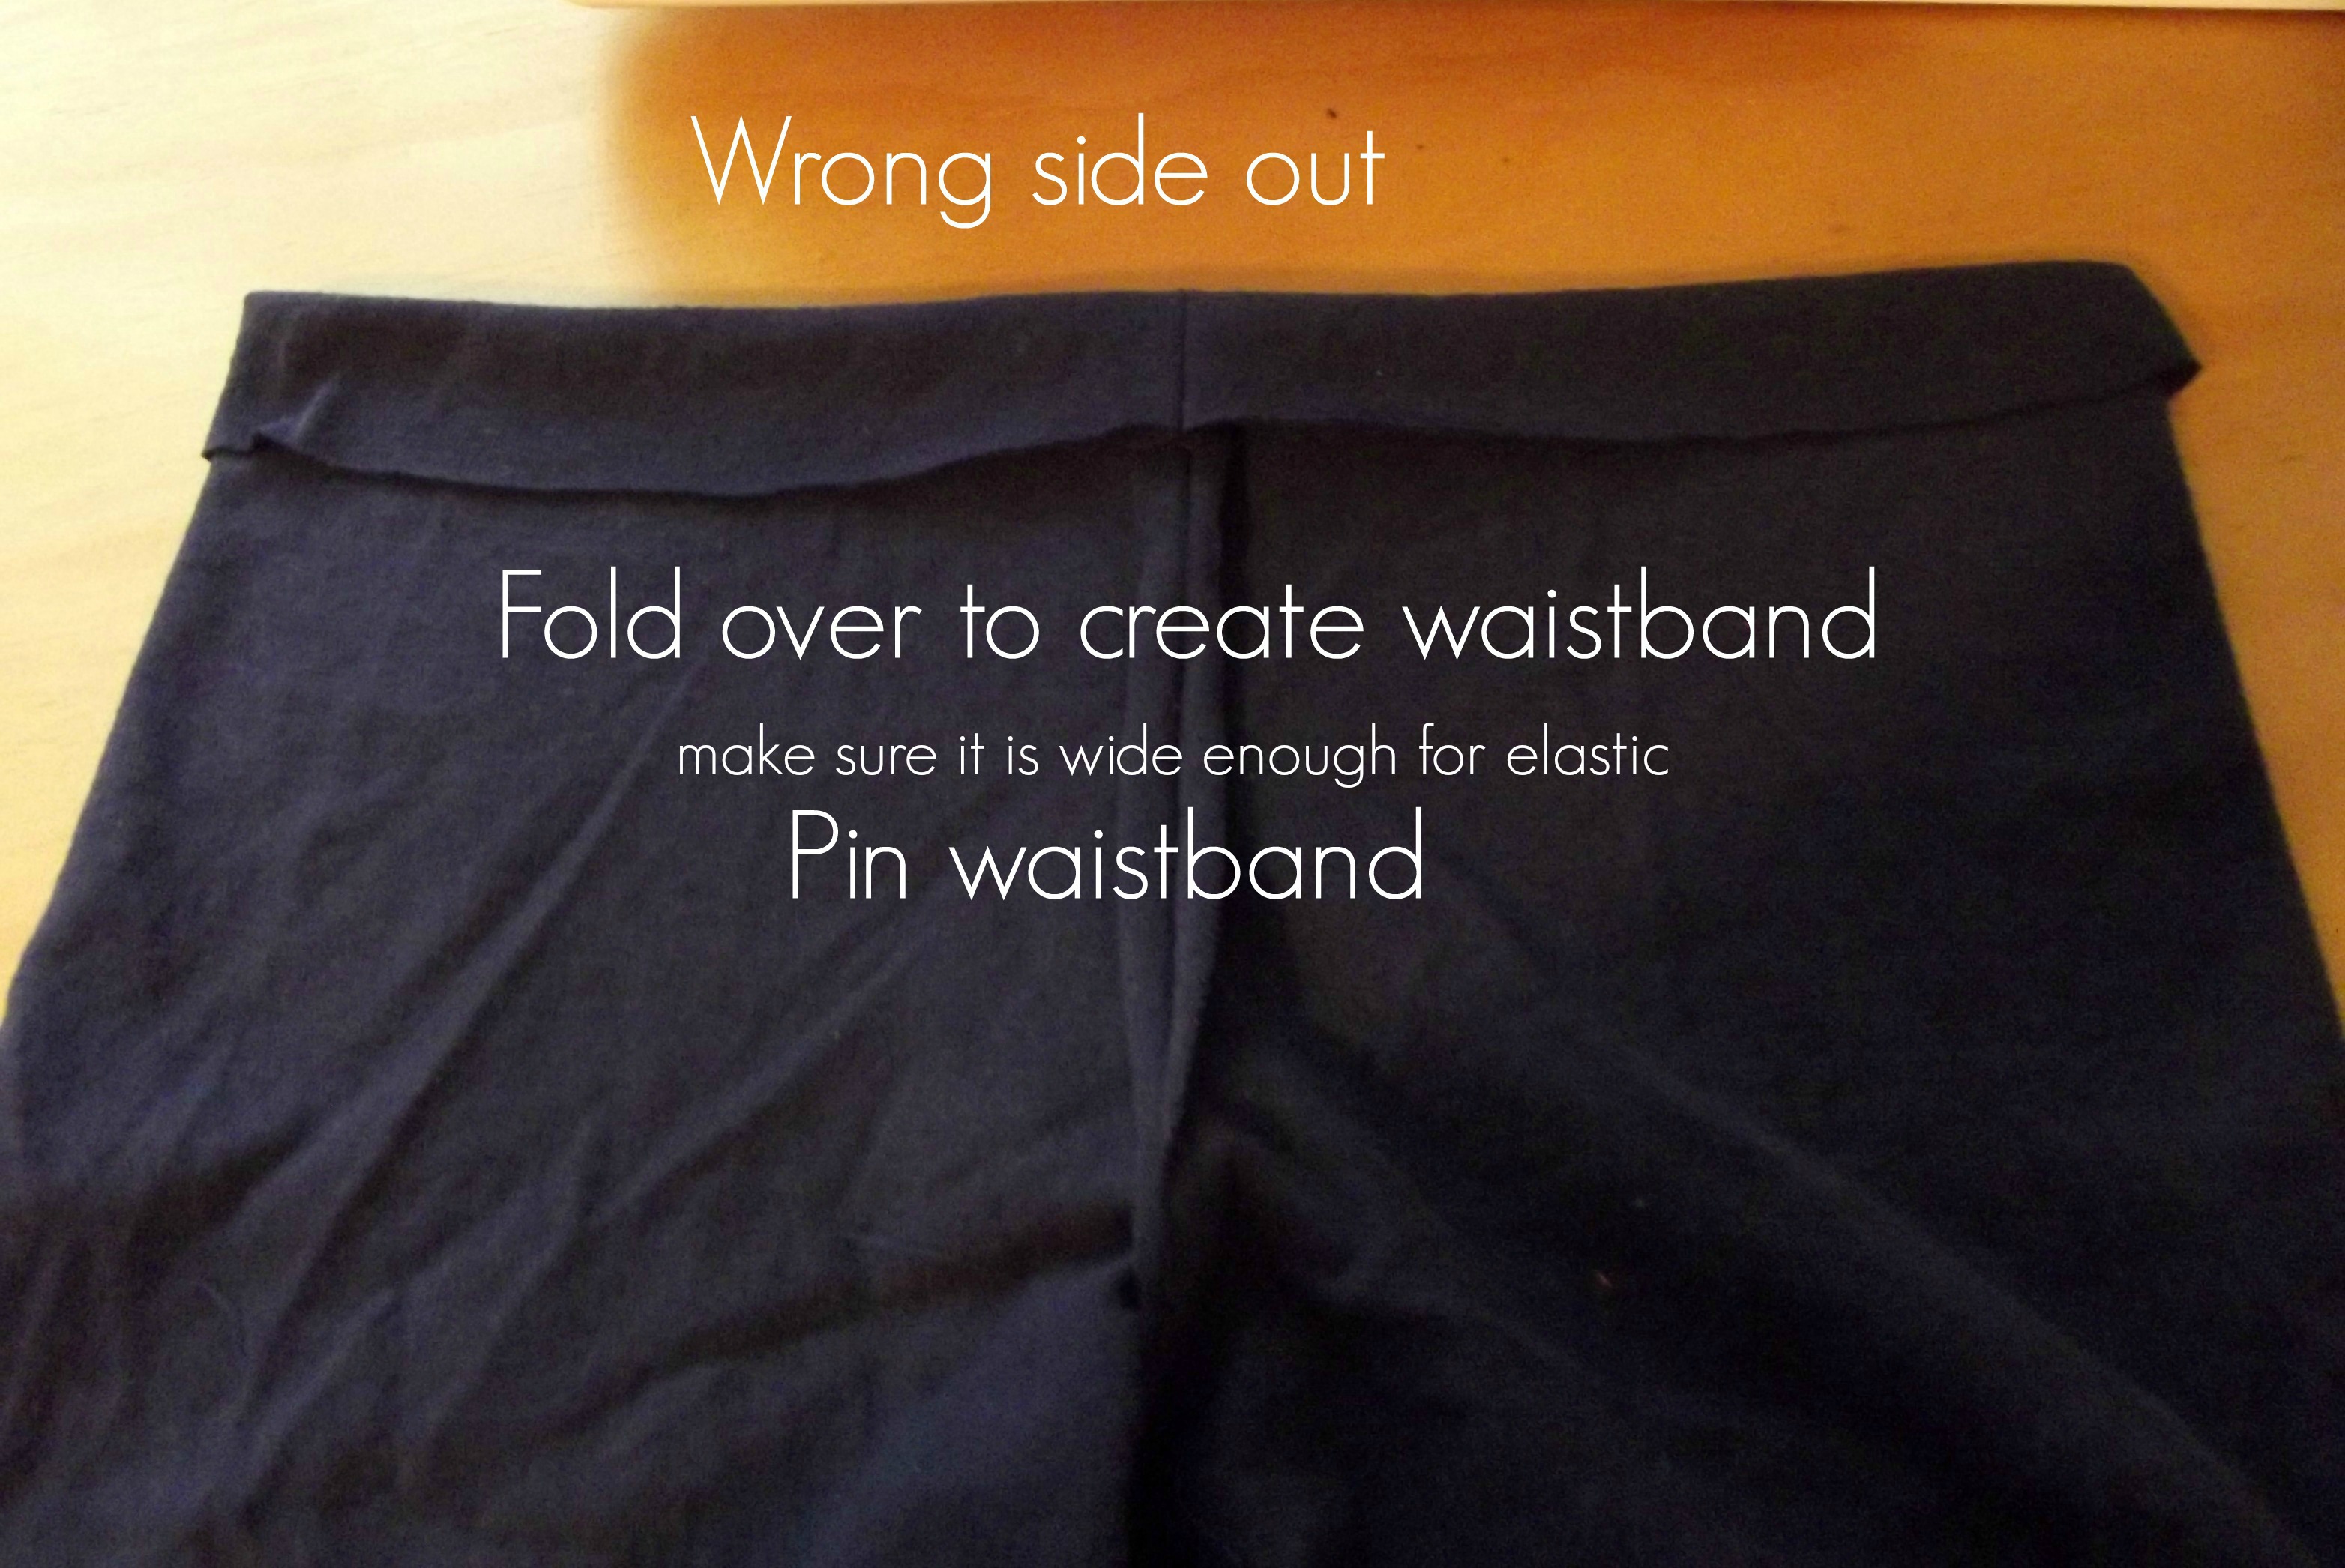
Flip shorts right side out again and sew along waistband, leave ample space for the width of the elastic waistband. DO NOT sew the waistband closed, you need to leave an opening to thread the elastic through and make to give yourself a big enough opening to work with.

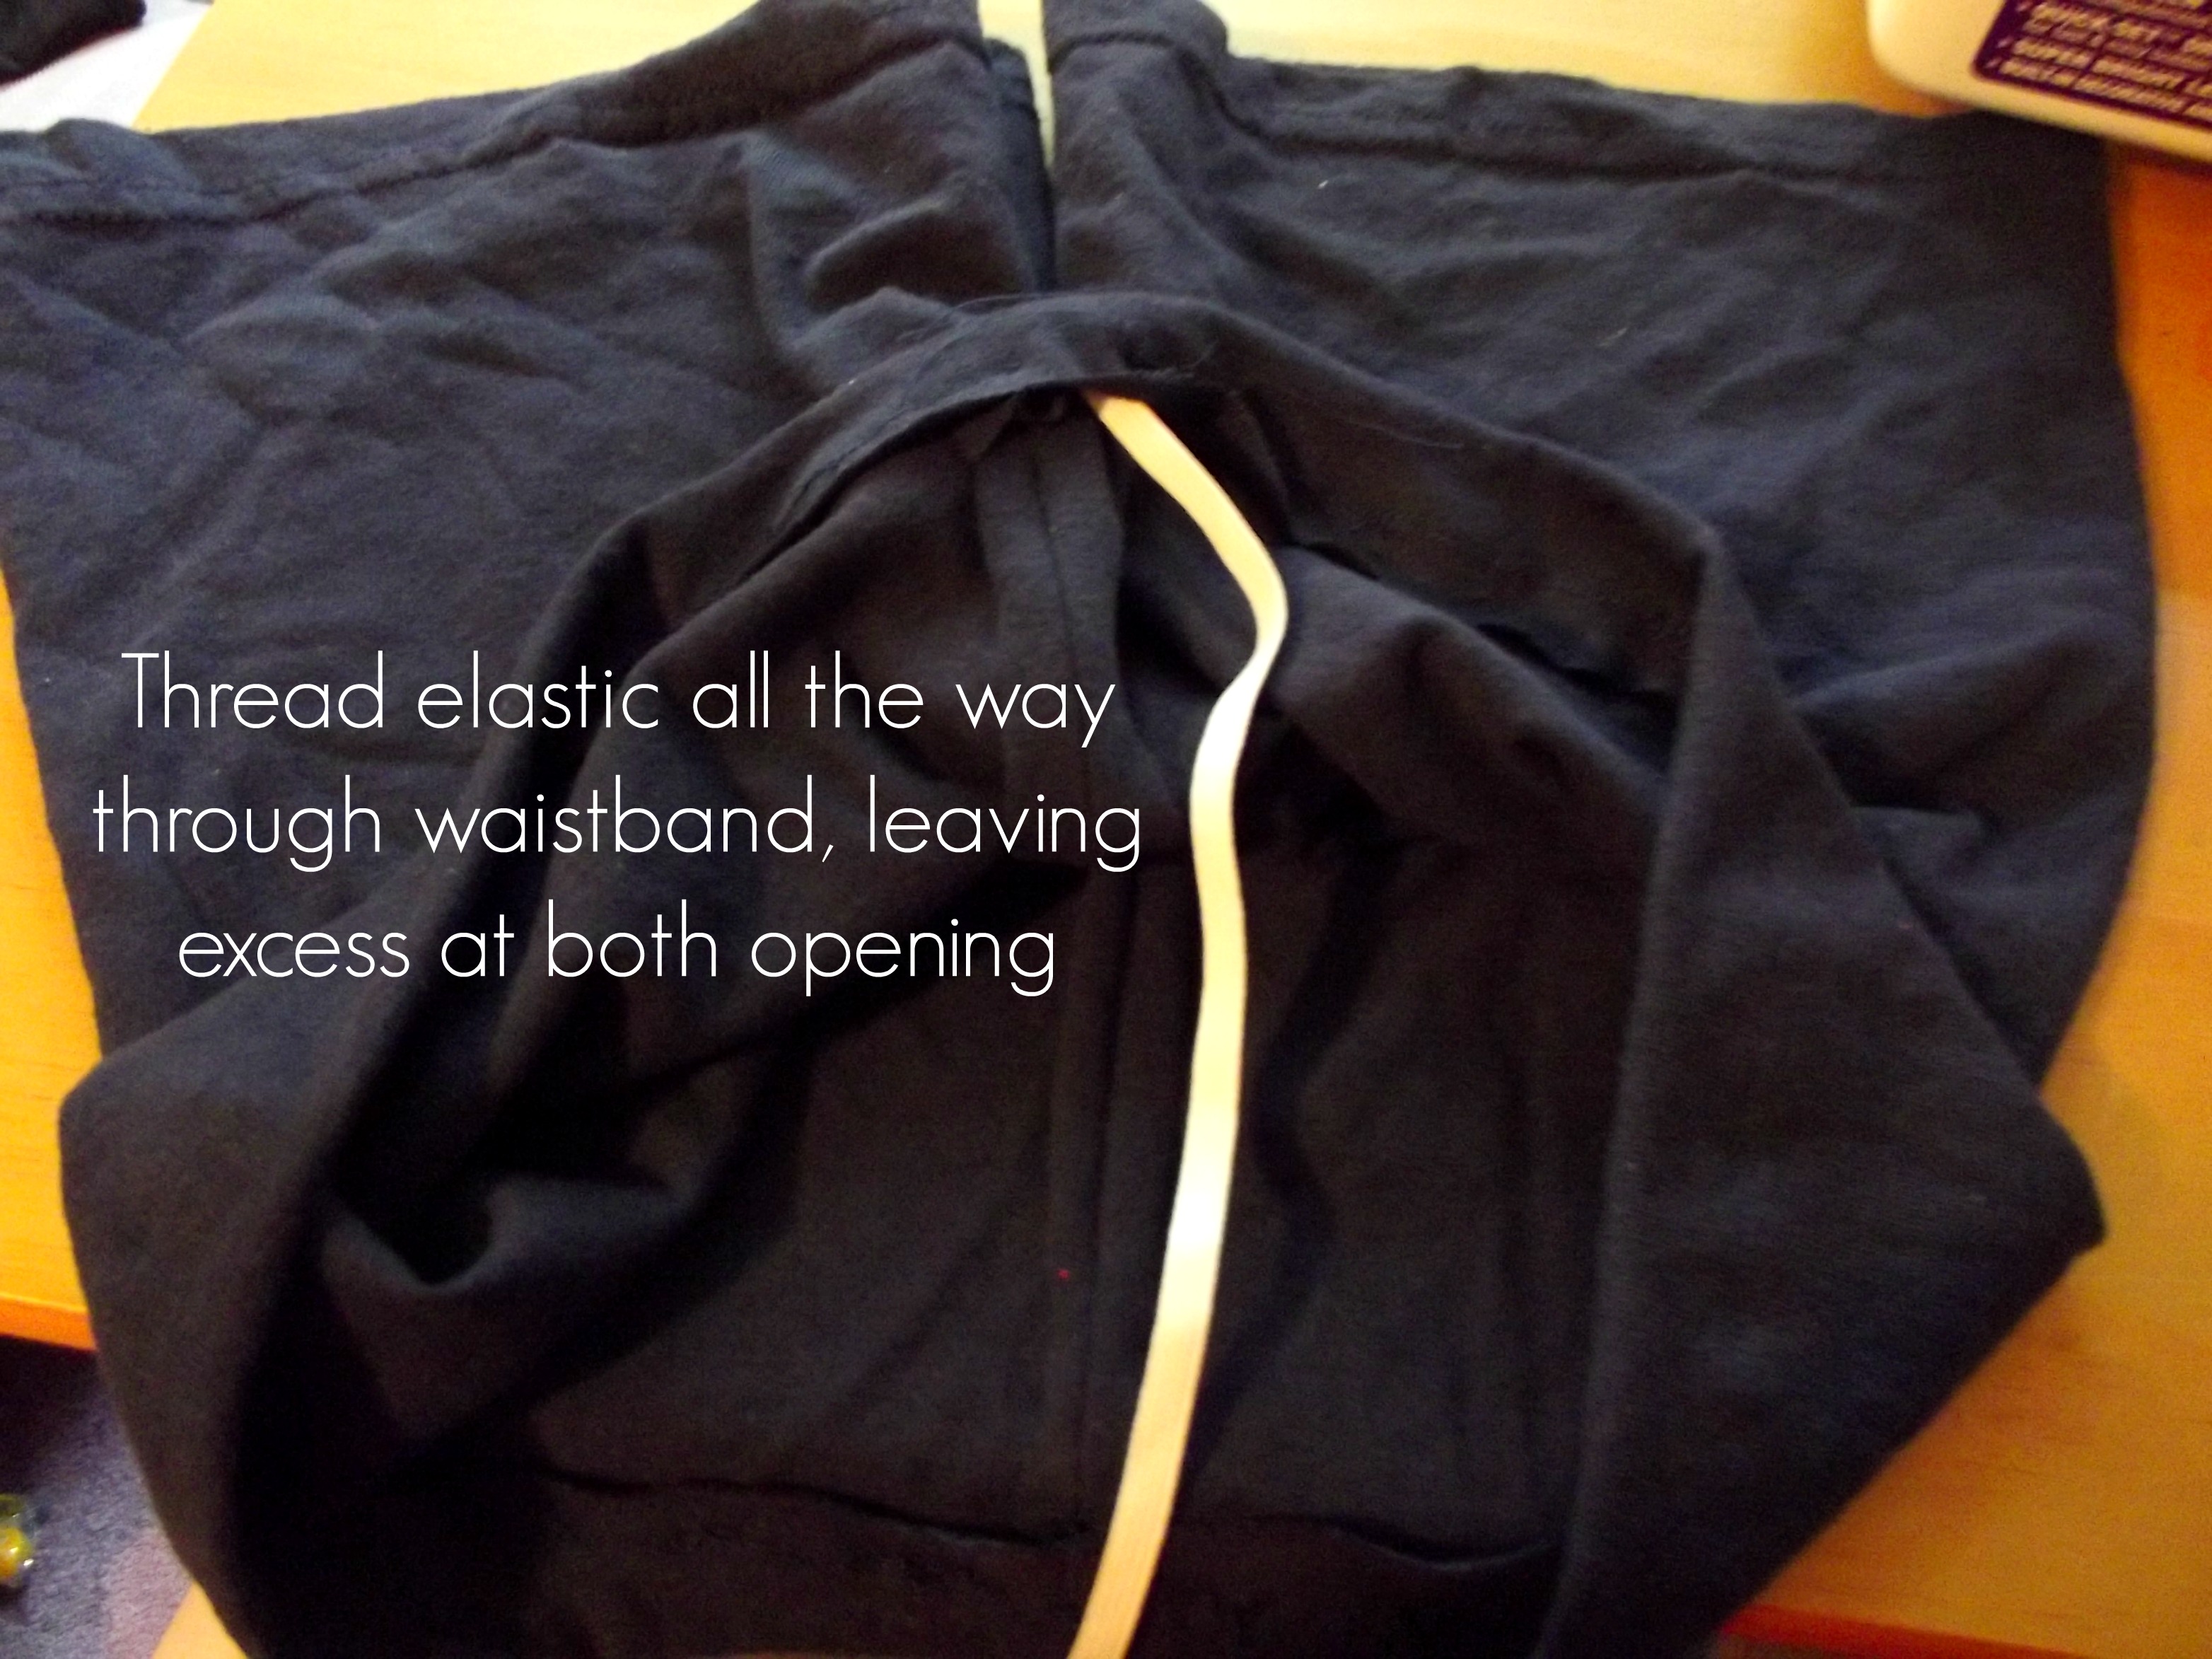
Now take a safety pin and attach it to the end of the elastic and stick that in the waistband opening and work it all the way around the shorts till it come out the other side of the opening. Pull the ends a little so you have enough excess elastic to sew together.
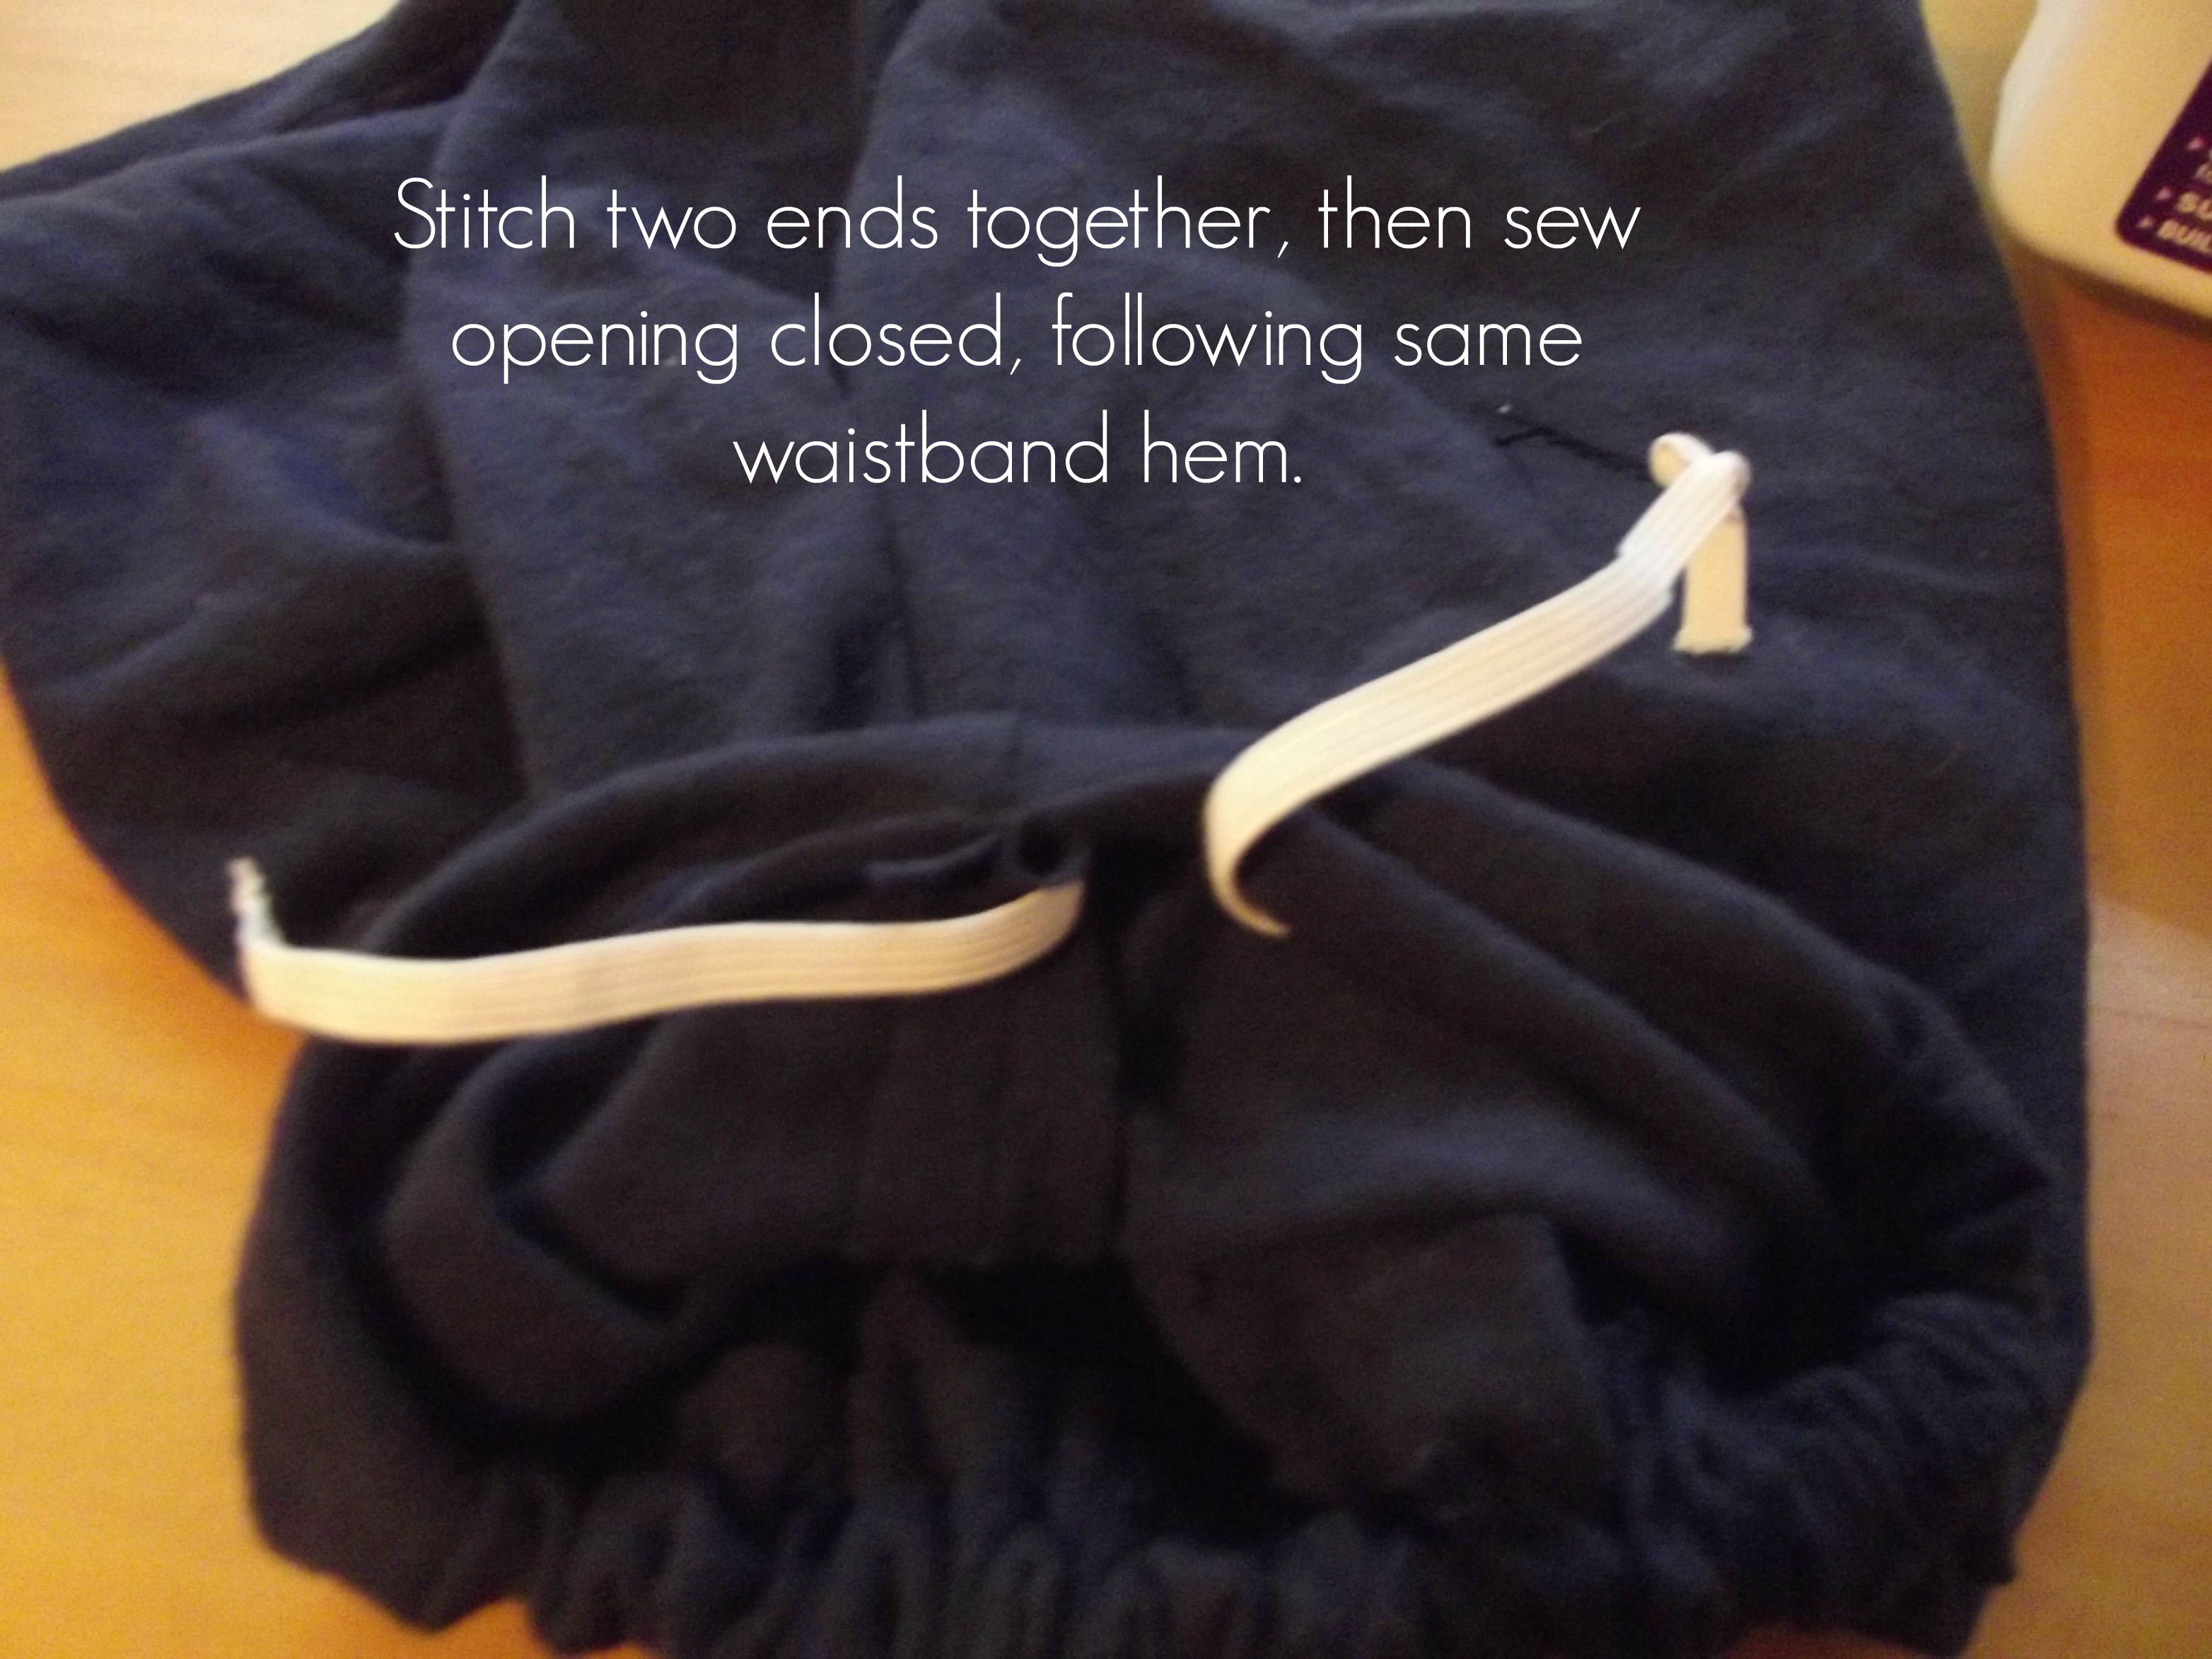
Stitch the two ends of the elastic together and straighten out the elastic in the waistband and then finish sewing the waistband closed. You can additionally sew a small line from back seam to the top of the waistband to secure the elastic in place, and repeat with the front seam. This will prevent the elastic from twisting.
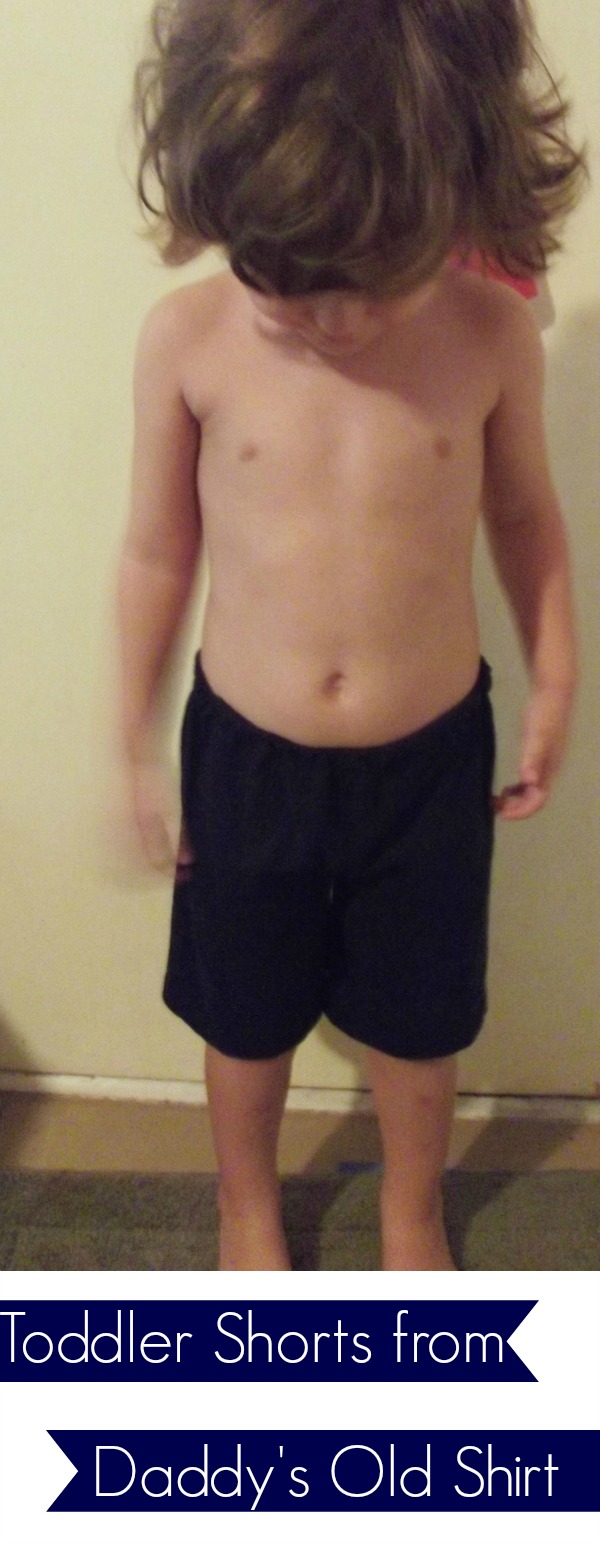
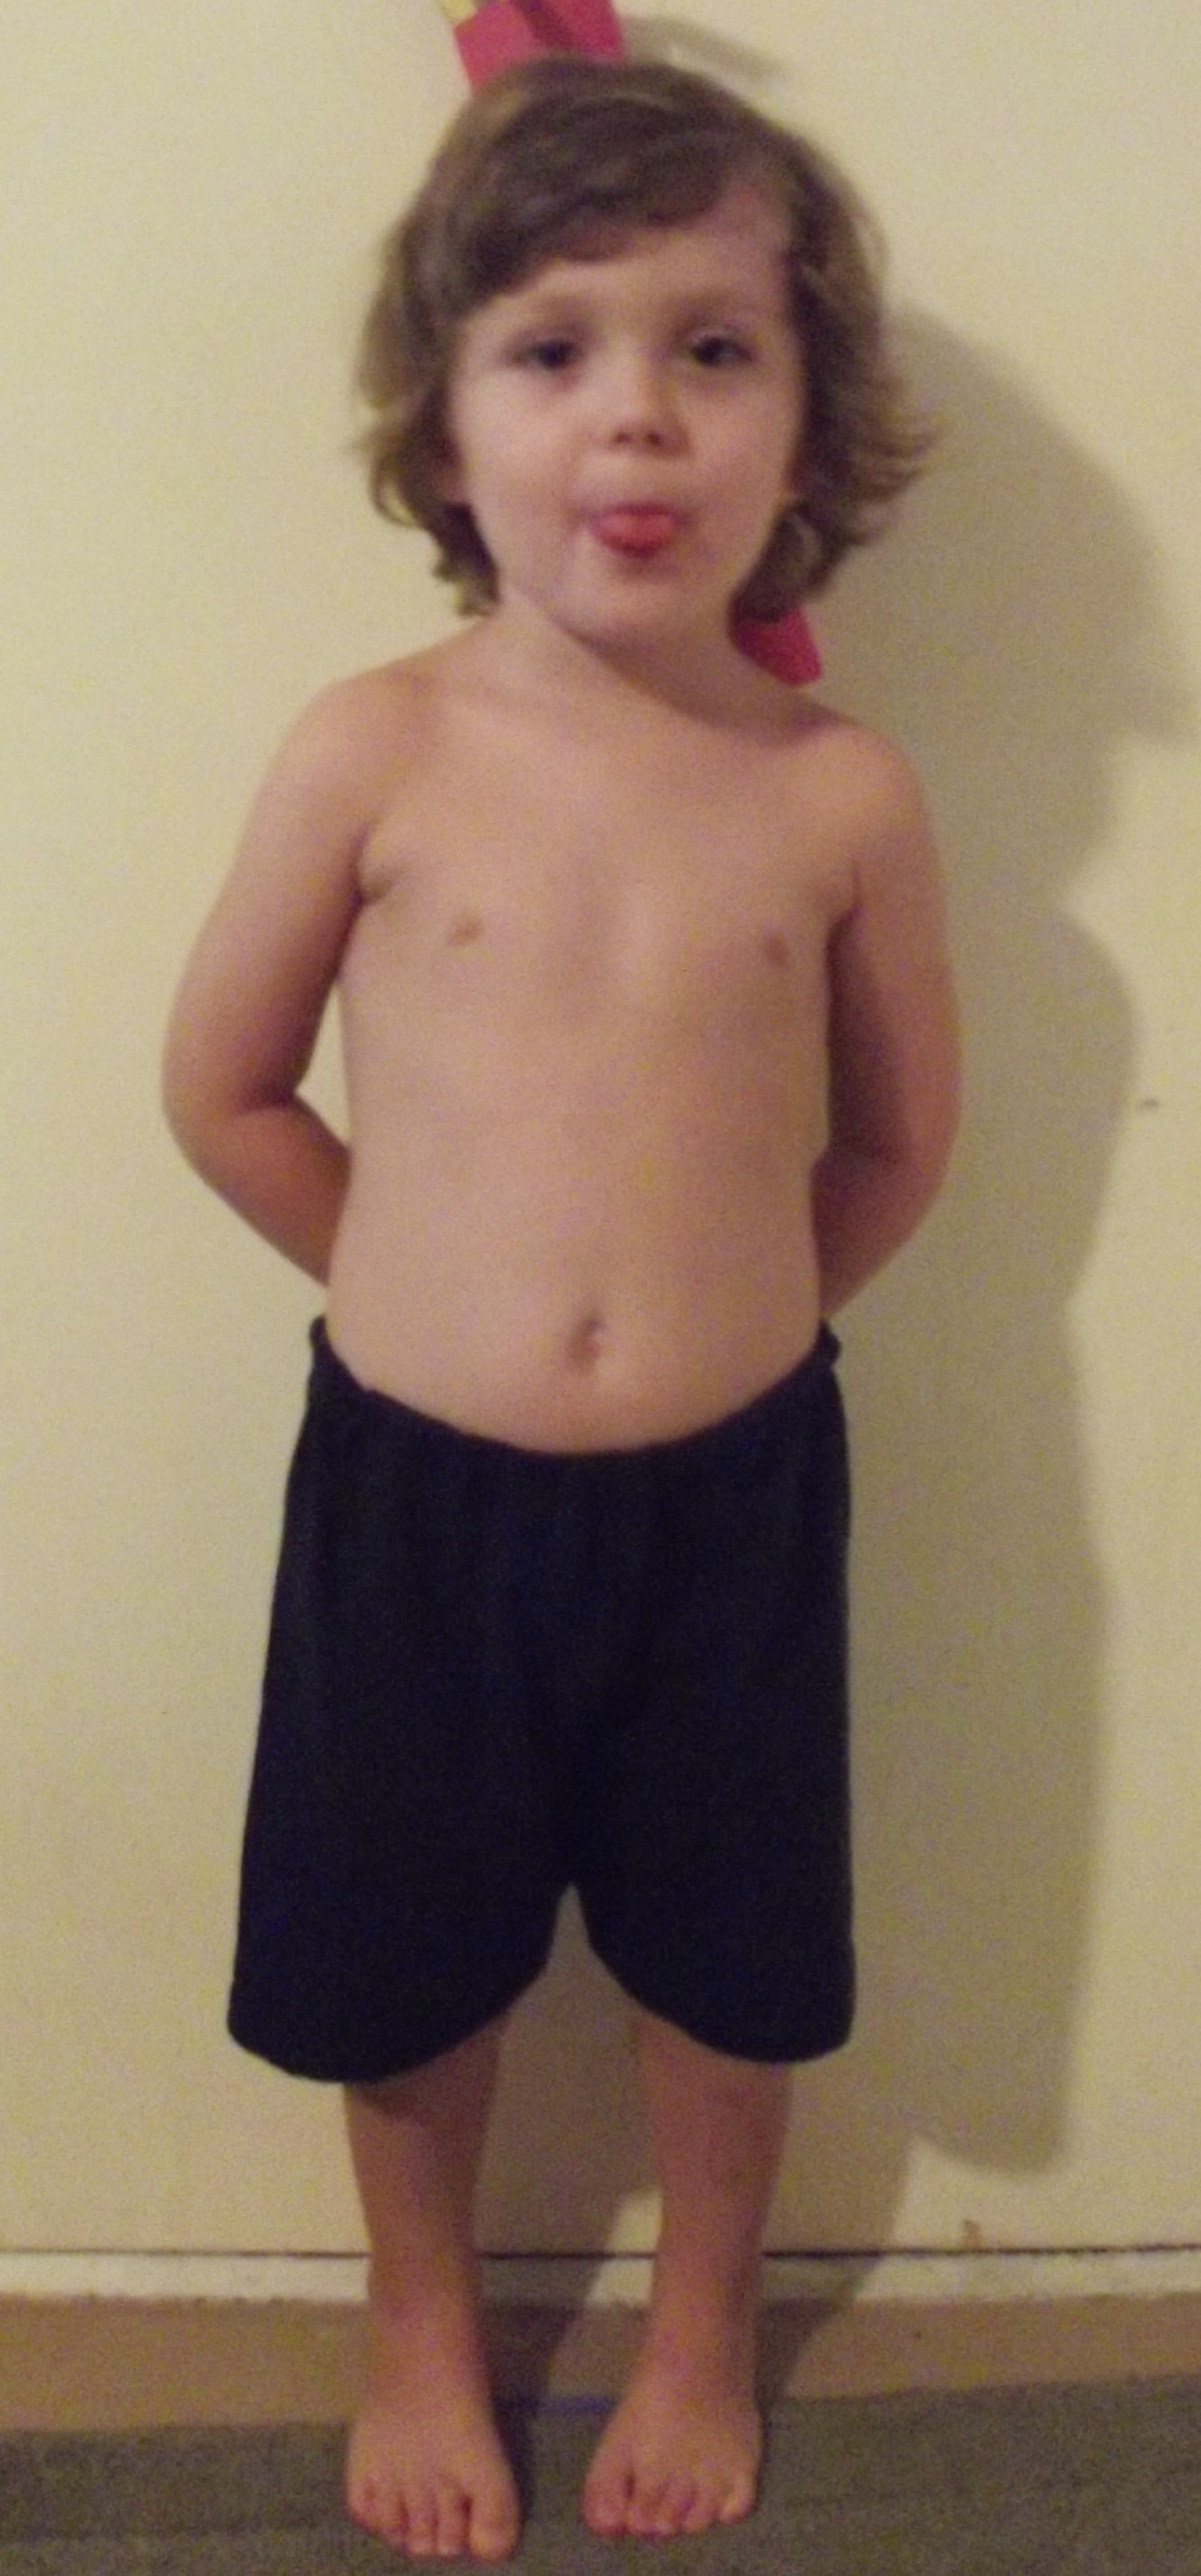
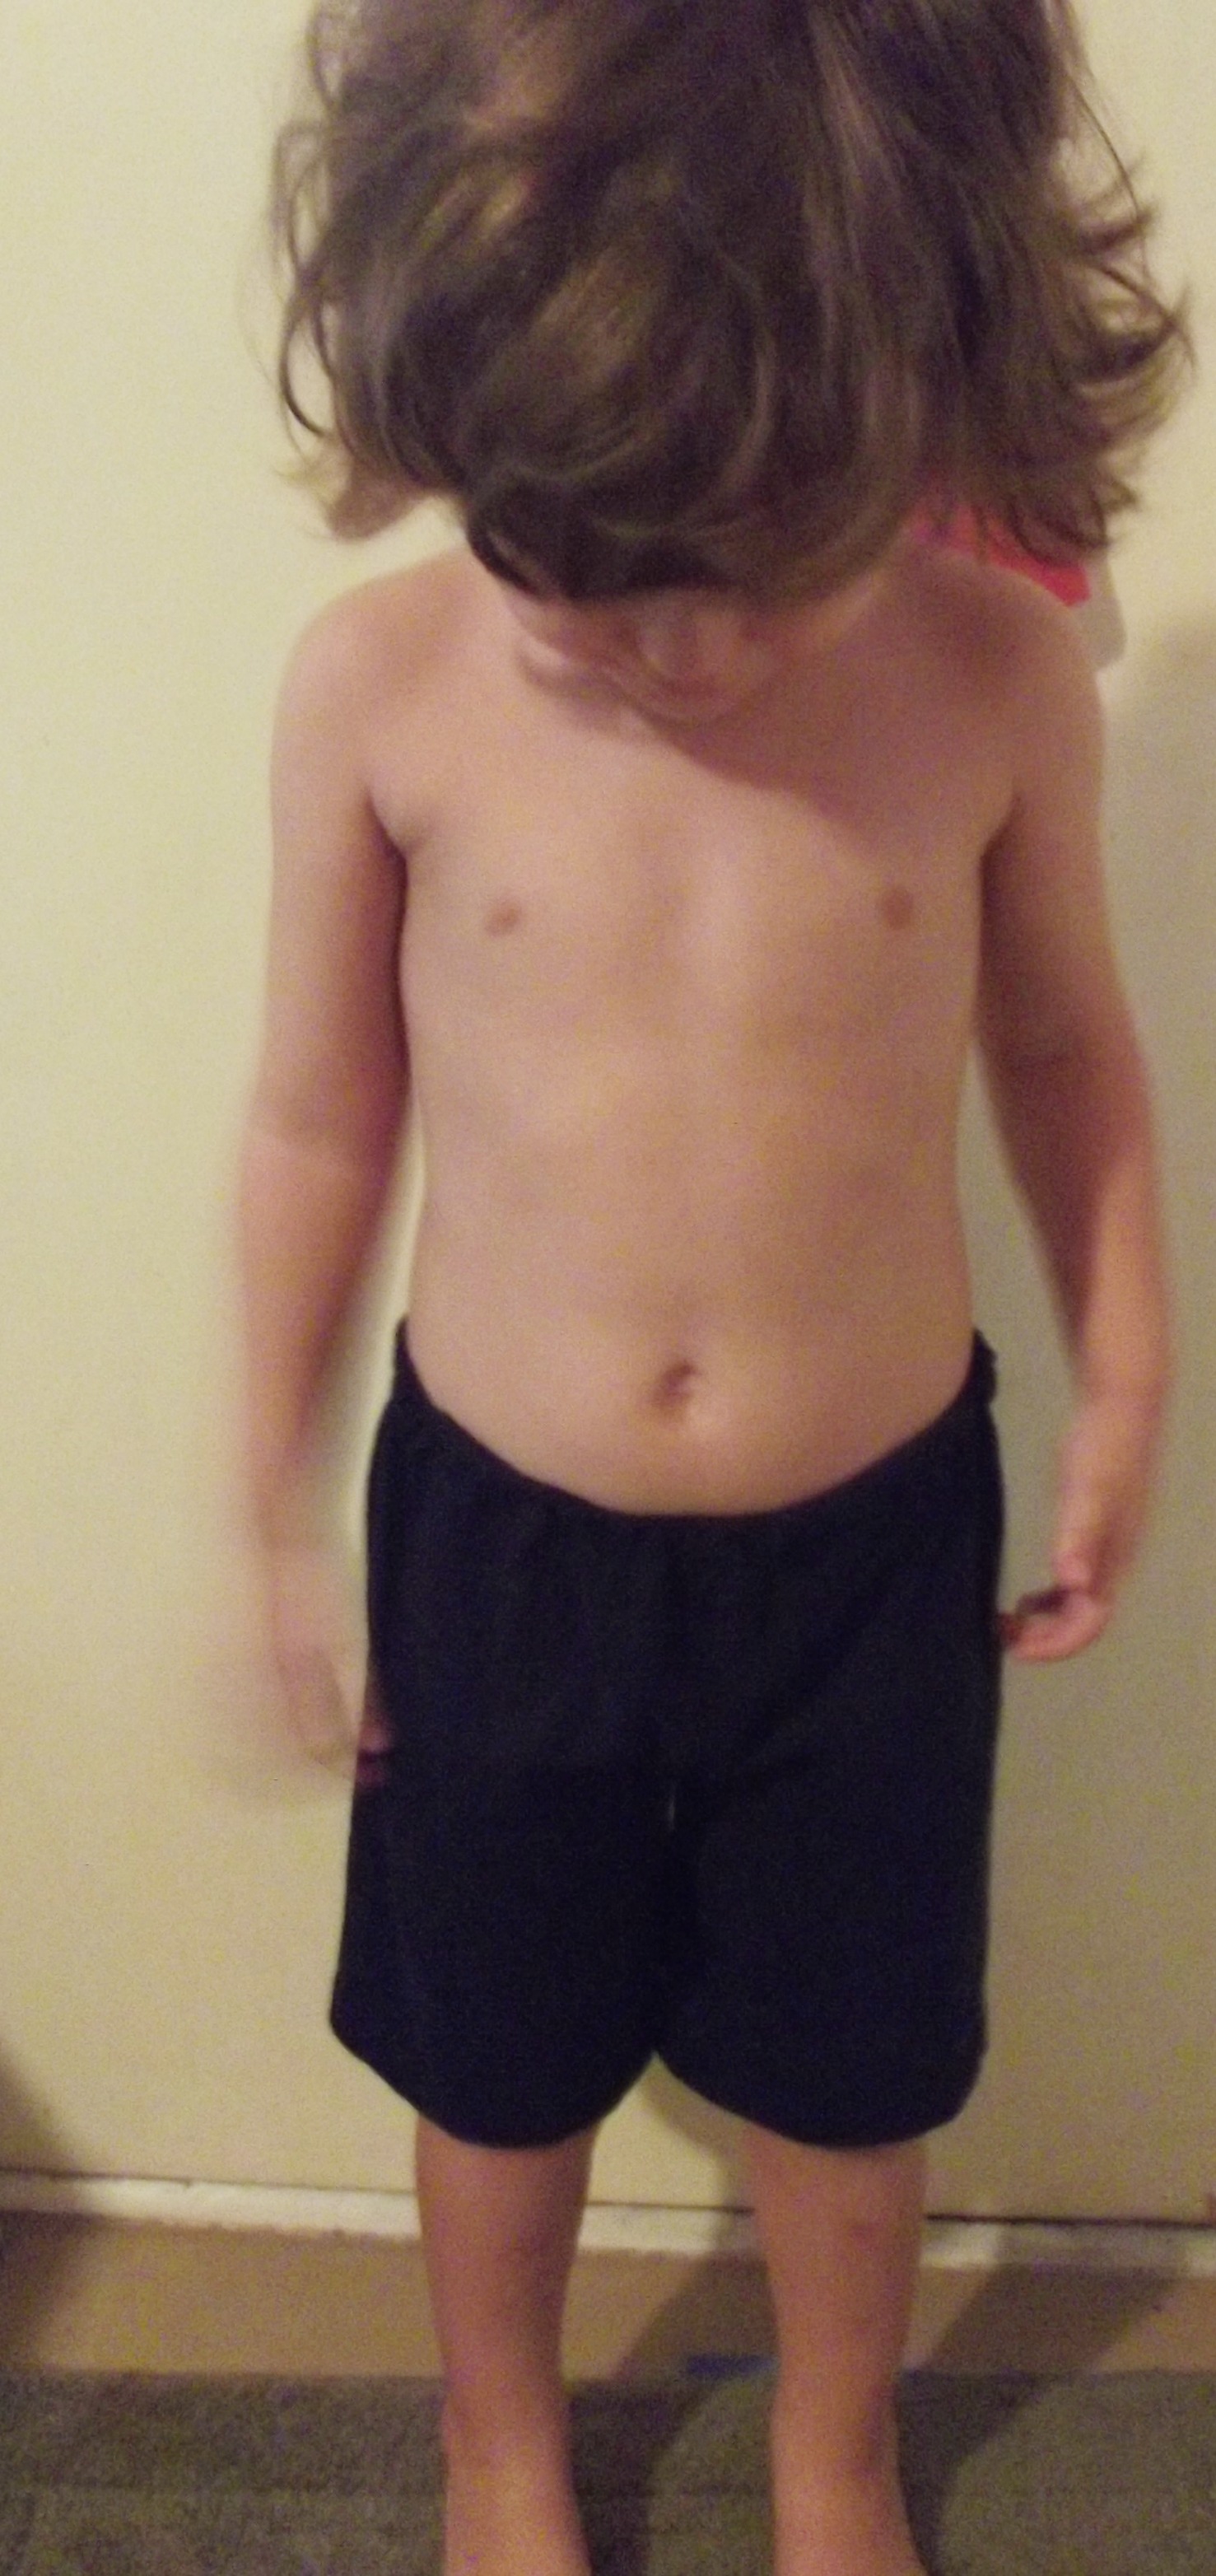
There you go!! Shorts are done!!! And didn’t cost me a penny!
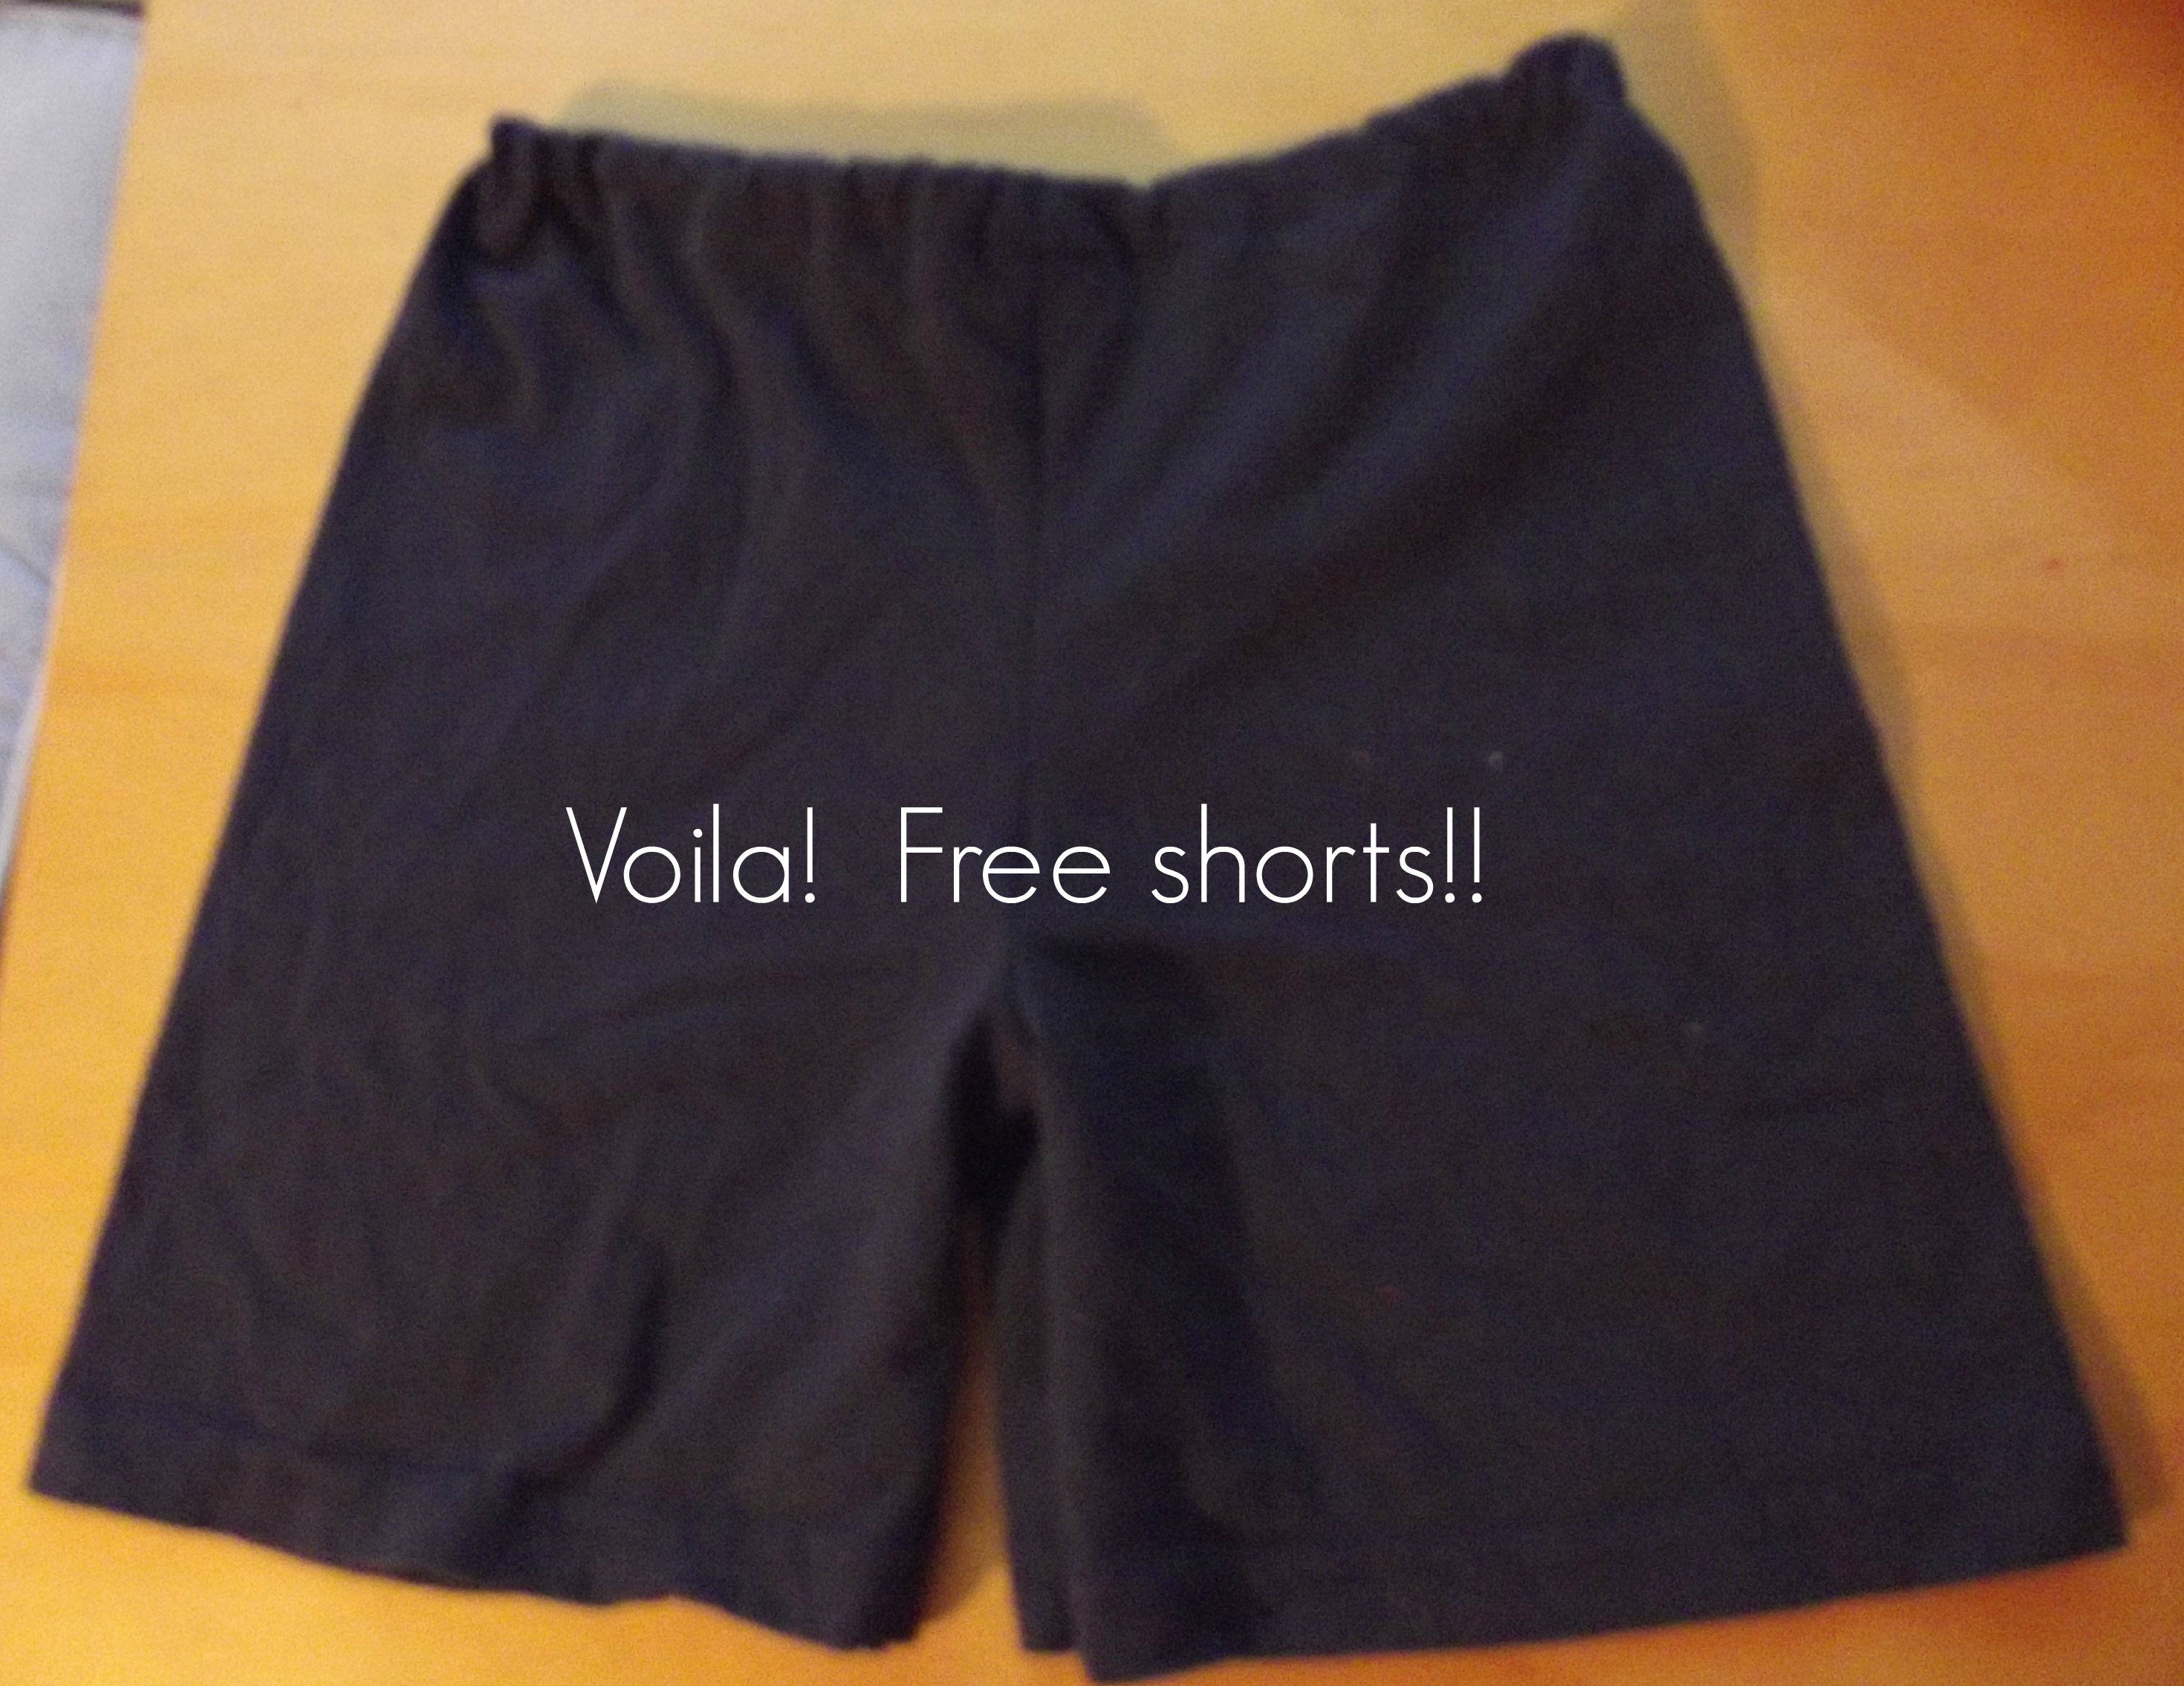
Dean certainly loves them!!
Linked at:
![]()


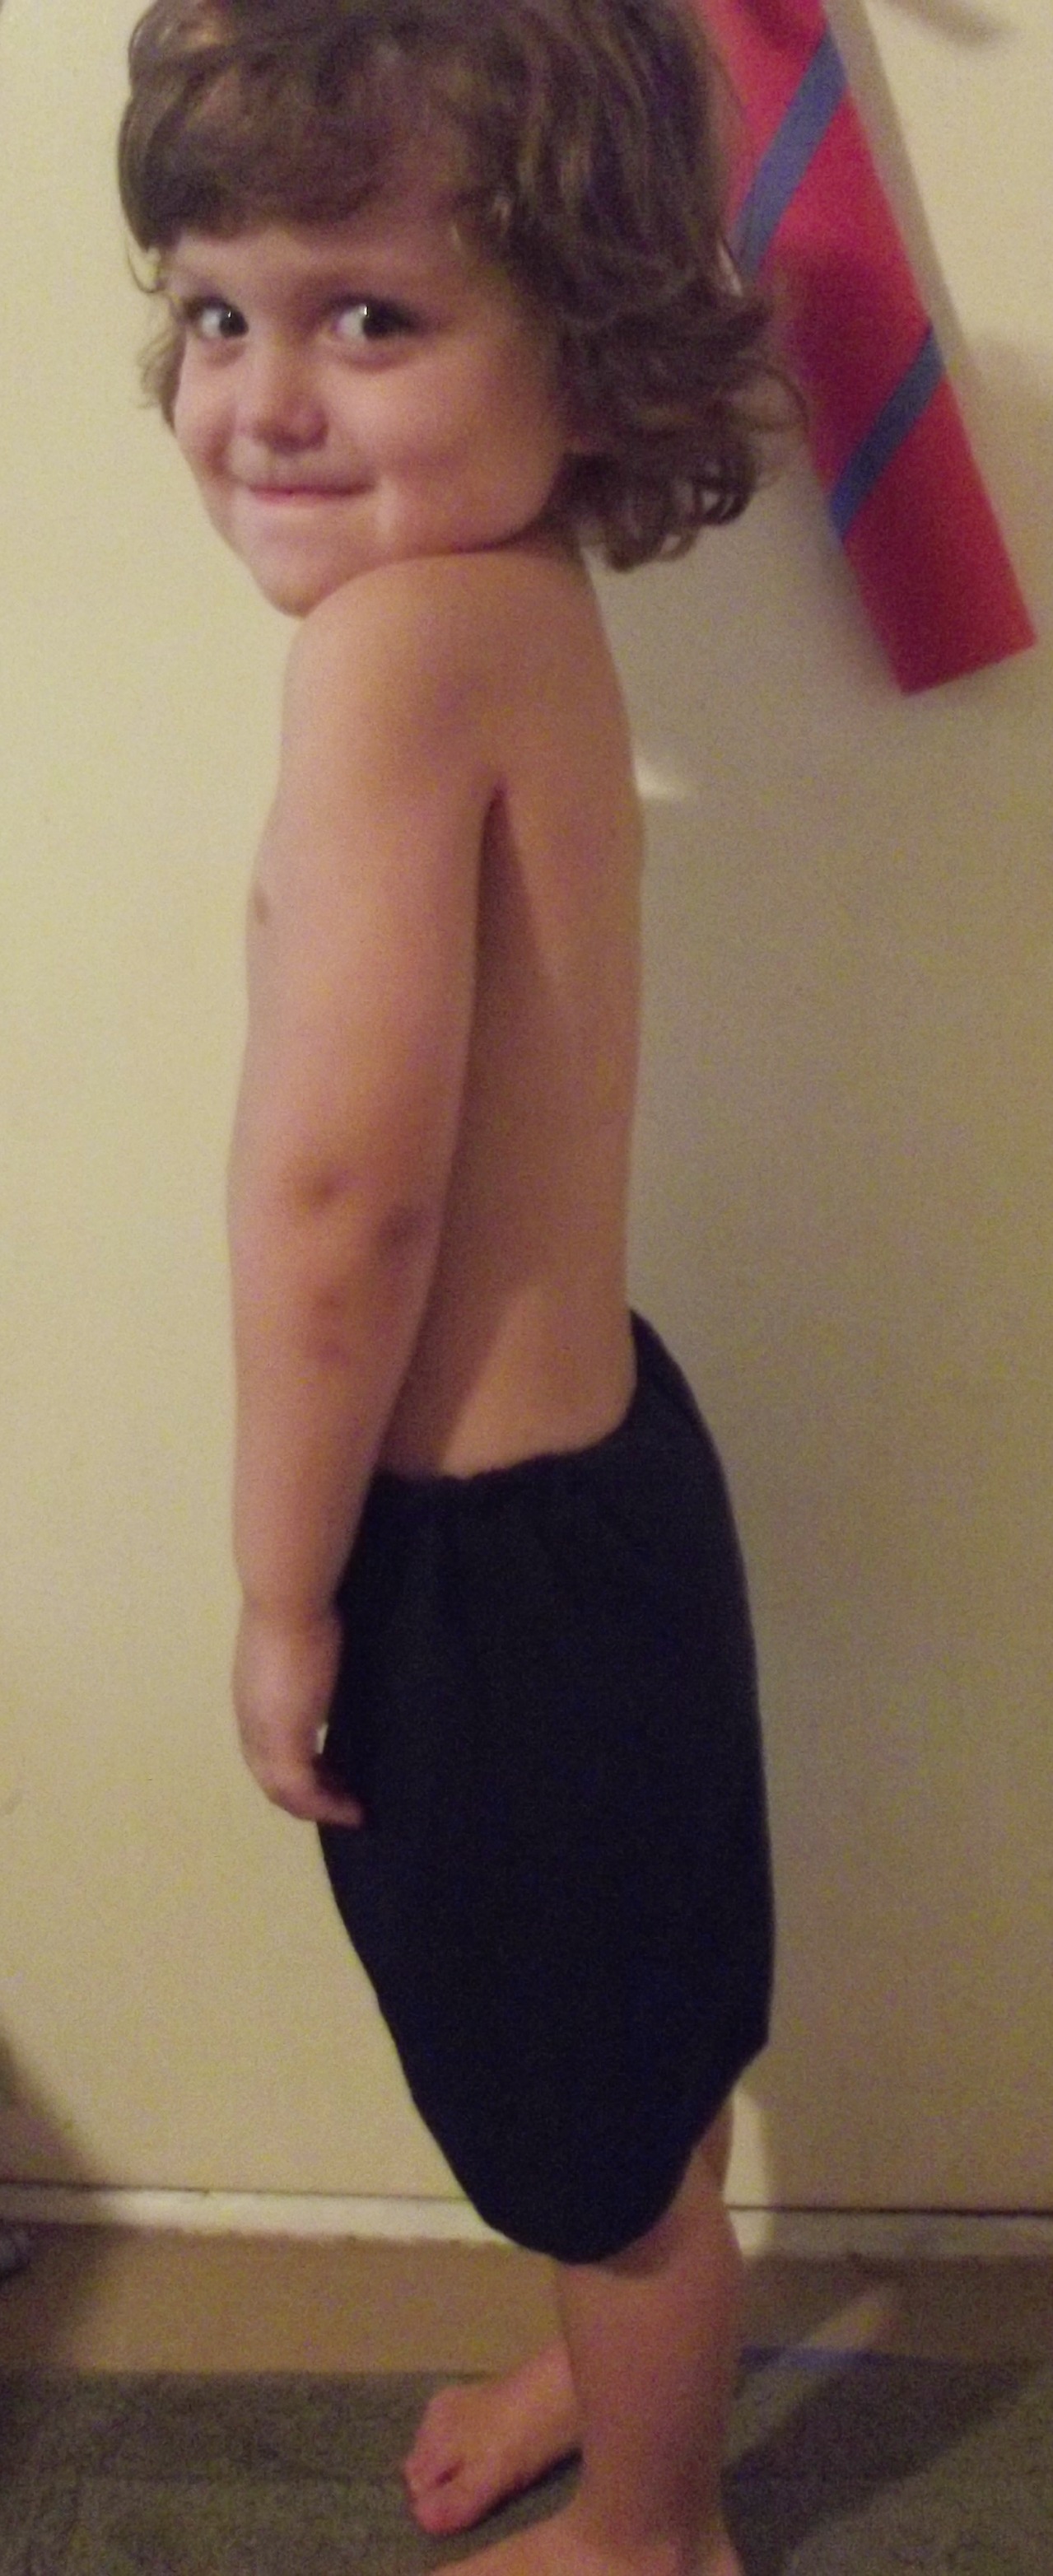
Such a great idea! And how cute is that picture from the side!?!
Kristin
Lol thanks!!! That was his model pose lol!
This is such a great idea! We have so many of old t-shirts from daddy hanging around and now I know what to do with them.
Yay!! So glad you are going to make some, they are sooo comfy!
That’s a great tutorial. I wish it was around when my kids were small :) Maybe for the grandchildren (but not just yet…)
Great work on those shorts! Love that they are upcycled – and your tutorial is lovely and clear!
http://olga-kidapproved.blogspot.com.au/2013/07/vintage-pillow-skirt-tutorial.html
OOps sorry – left the wrong link!! :(
Thanks for linking to a Round Tuit!
Hope you have a fabulous week!
Jill @ Creating my way to Success
http://www.jembellish.blogspot.com/
Now this is so smart, love when things can be repurposed! Saw this on Weekend Potluck :)
We’re sure our readers would also enjoy this, stop on over and link up at our SUPER SUNDAY Link Party which is live now.
Lori
Who Needs A Cape? (Not Your Average Super Moms!)
Very clever! Thanks for sharing your how-to.
What a great idea! Love this! Will definitely be trying! Thanks!
Emily @ elizabethjoandesigns.com
So, no matter what, that’s a super awesome idea. I love it! Thanks for sharing at Pinworthy Projects.
WOW. I love this. I just broke out my sewing machine last weekend and made a few purses (for my daughter) I am not great with straight lines and the thought of patterns….frustration! BUT this looks so doable! I am going to try it today! I can’t wait to re-learn to sew!!!! Thanks for sharing at the Friday Follow Along, I hope you will swing back by and linkup!
I’m going to do this! It’s very simple, functional, cute and practical. My favorite.